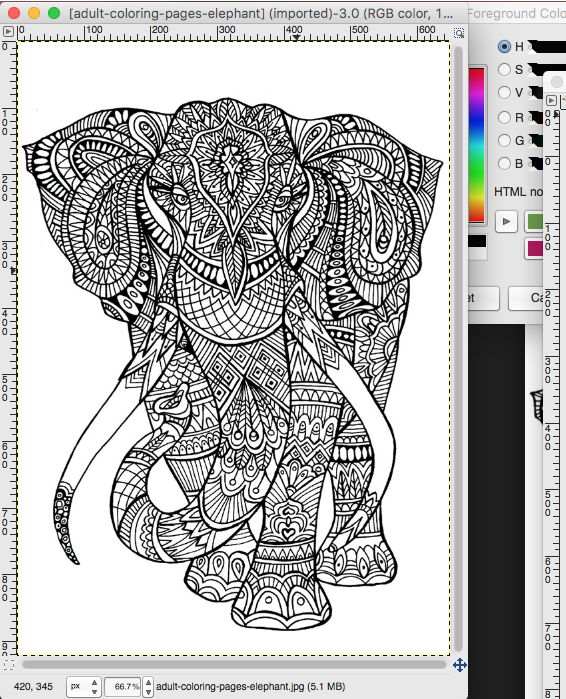
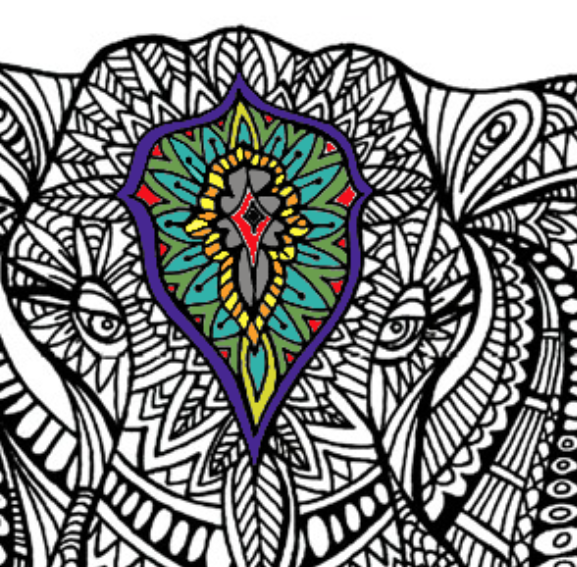
Digital Coloring PagesWith the craze of adult coloring books in full swing. I thought it might be fun to give some of you early finishers a chance to do a digital coloring page. It is simple, find a page you would like, save it. Open it in GIMP and Use your paint bucket tool to fill in the spaces. Some of these pages are very complicated so you will want to zoom in on various sections before you color. I will give you extra credit points or you can replace each completed page for a blog post in the future. have fun! OR.......You can play around with designing your own mandala coloring page.
Color Mandala: Allows you to design and save your own unique geometric mandala.
0 Comments
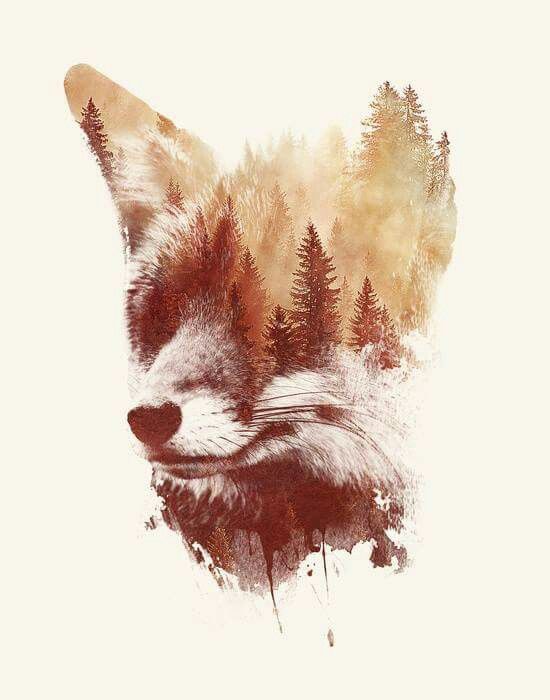
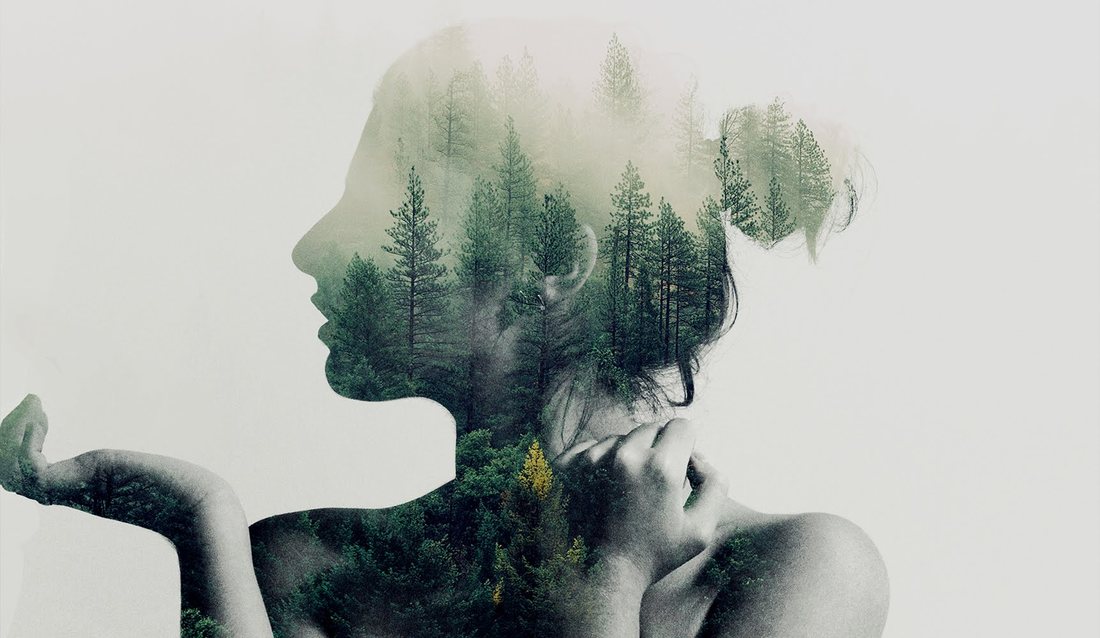
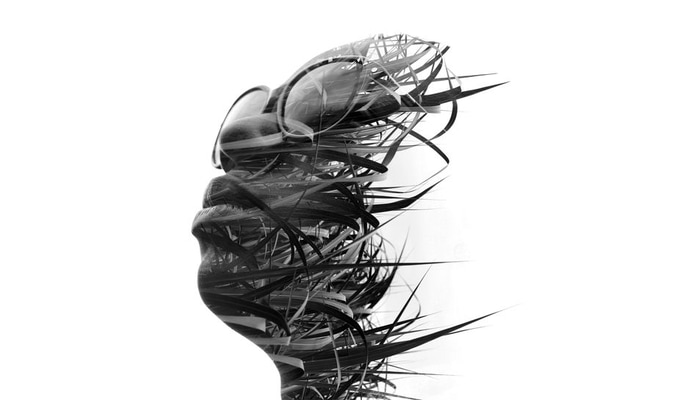
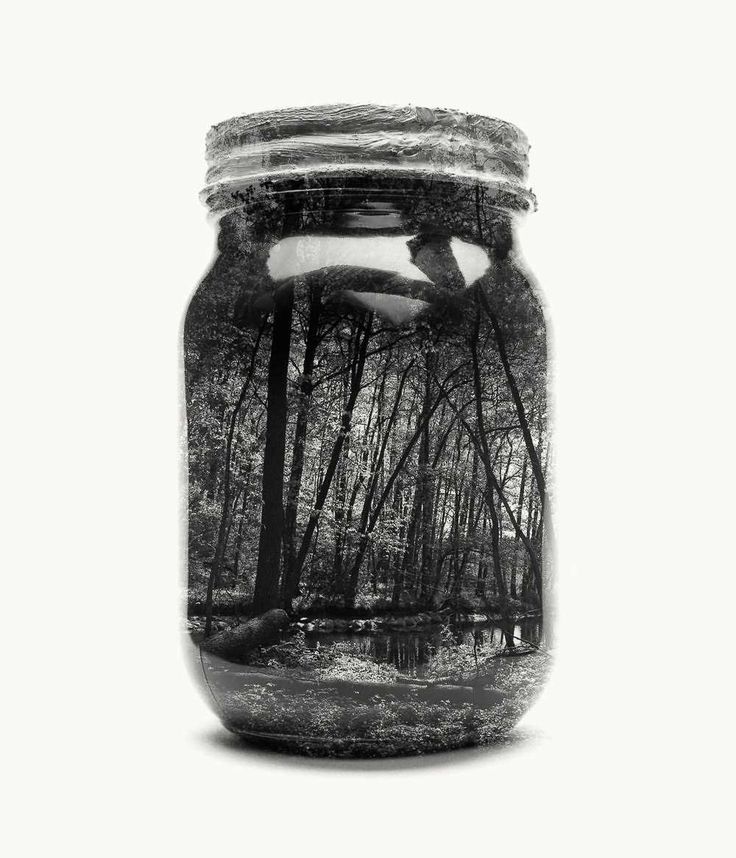
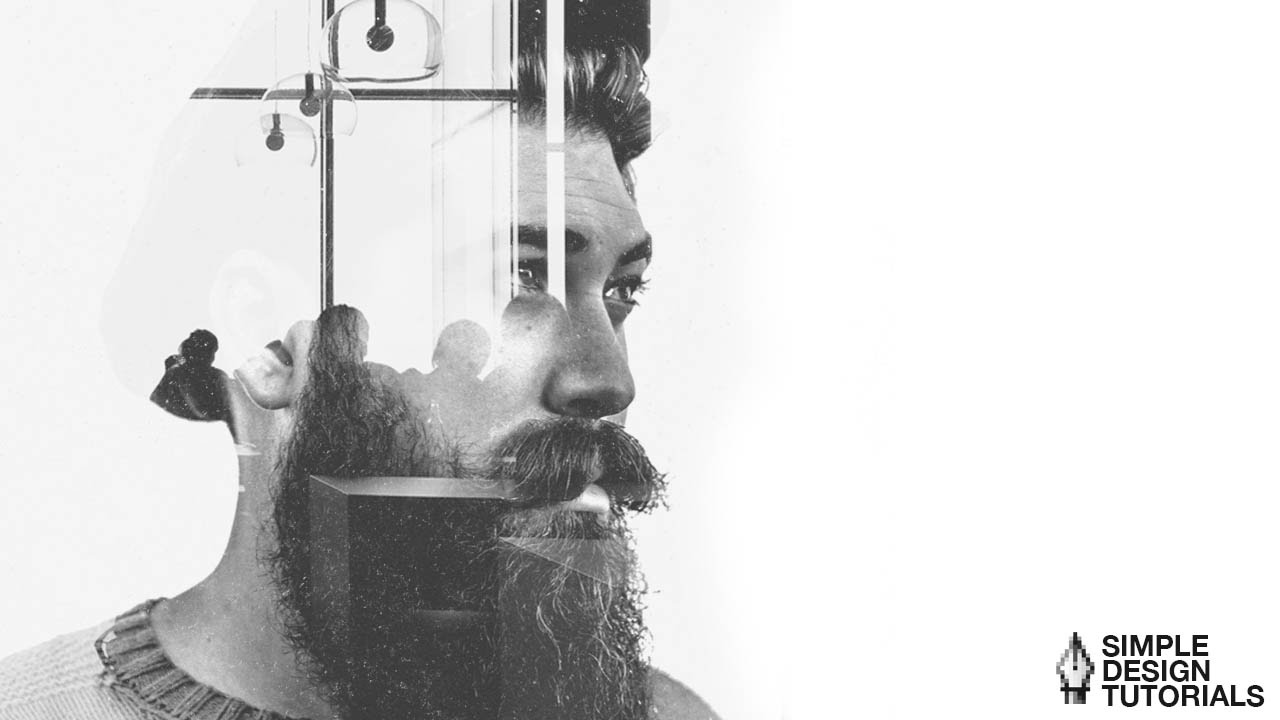
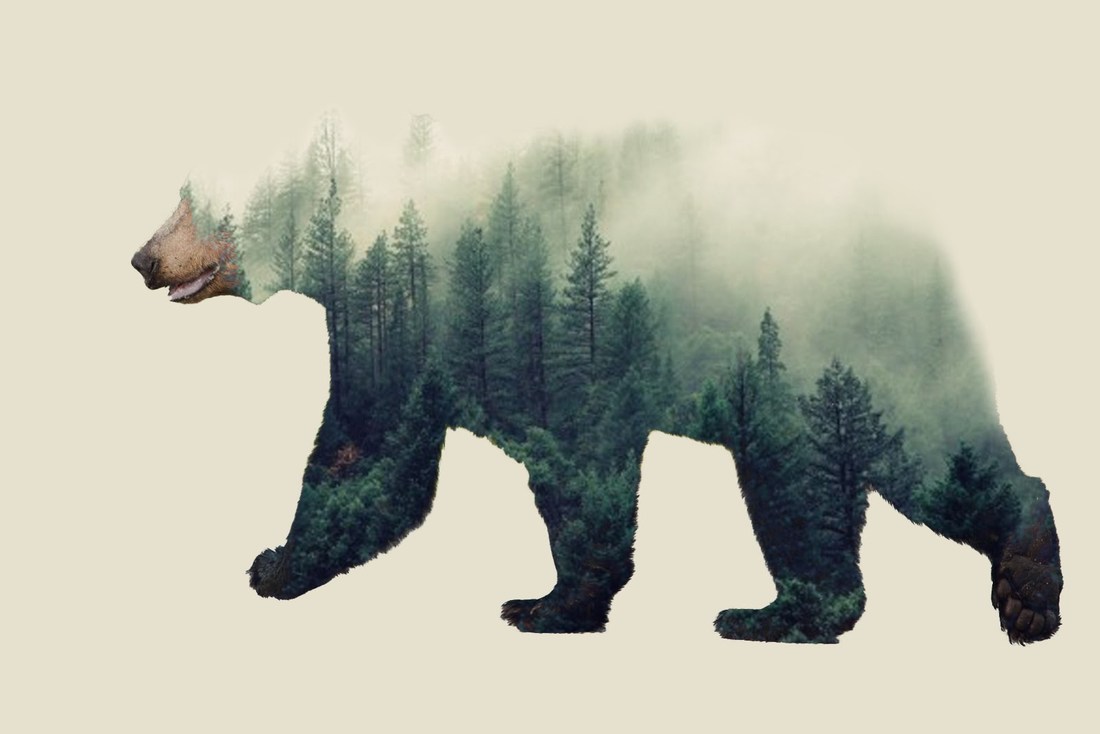
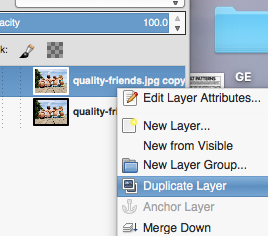
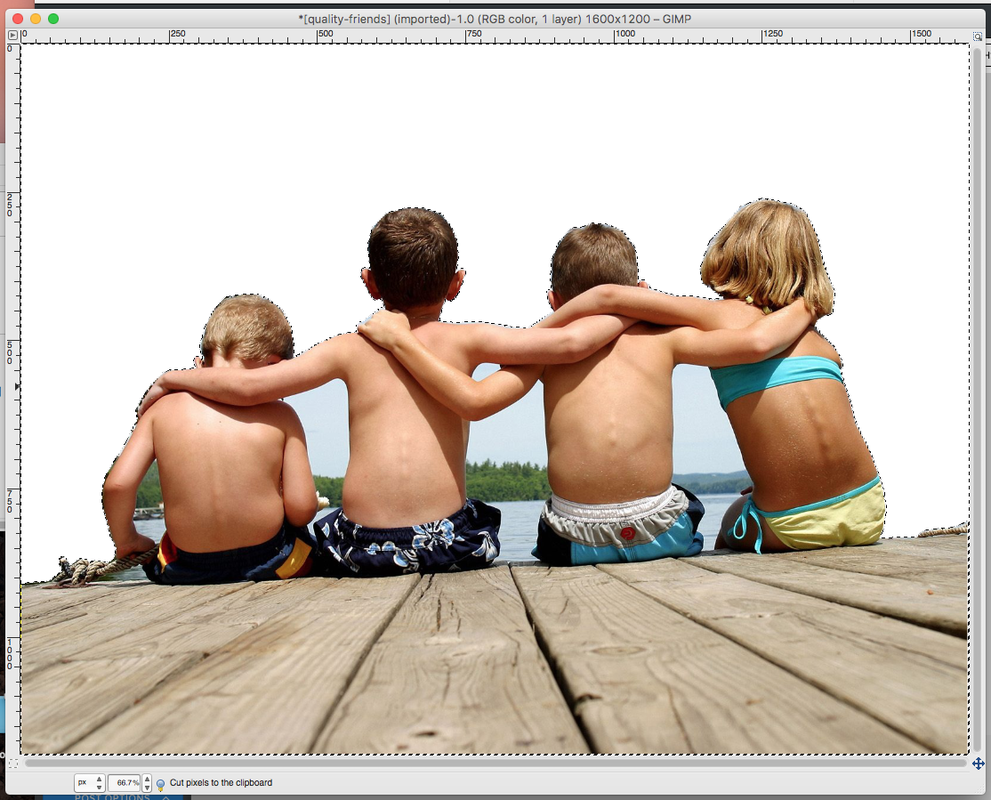
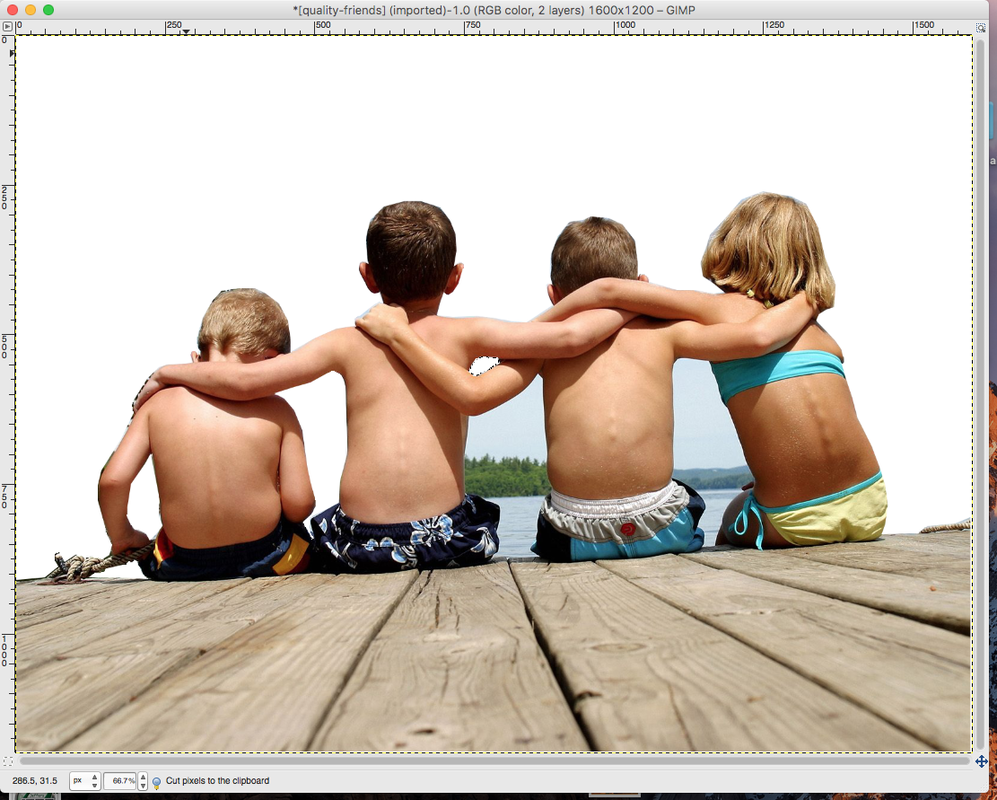
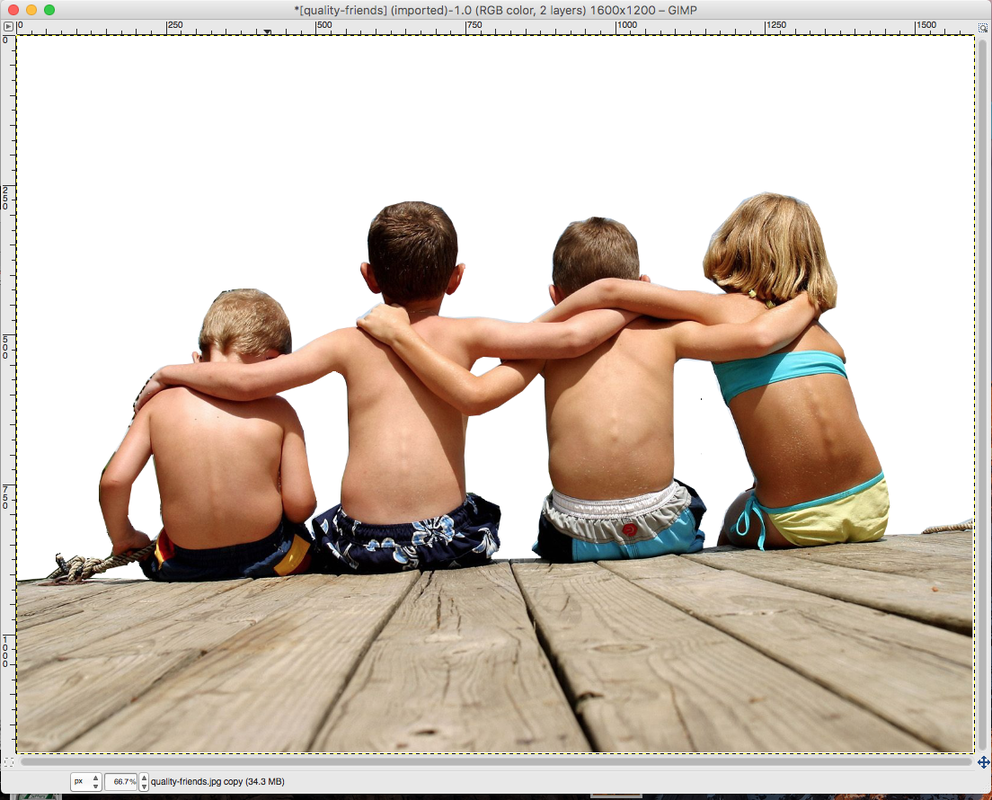
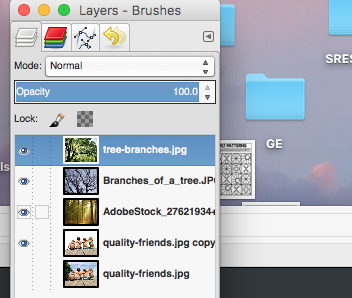
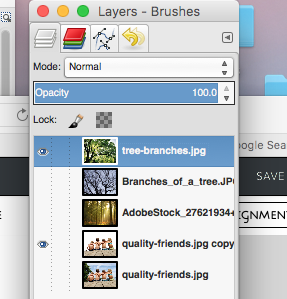
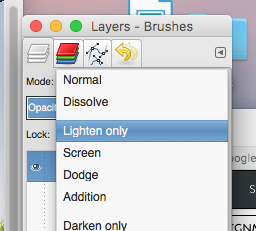
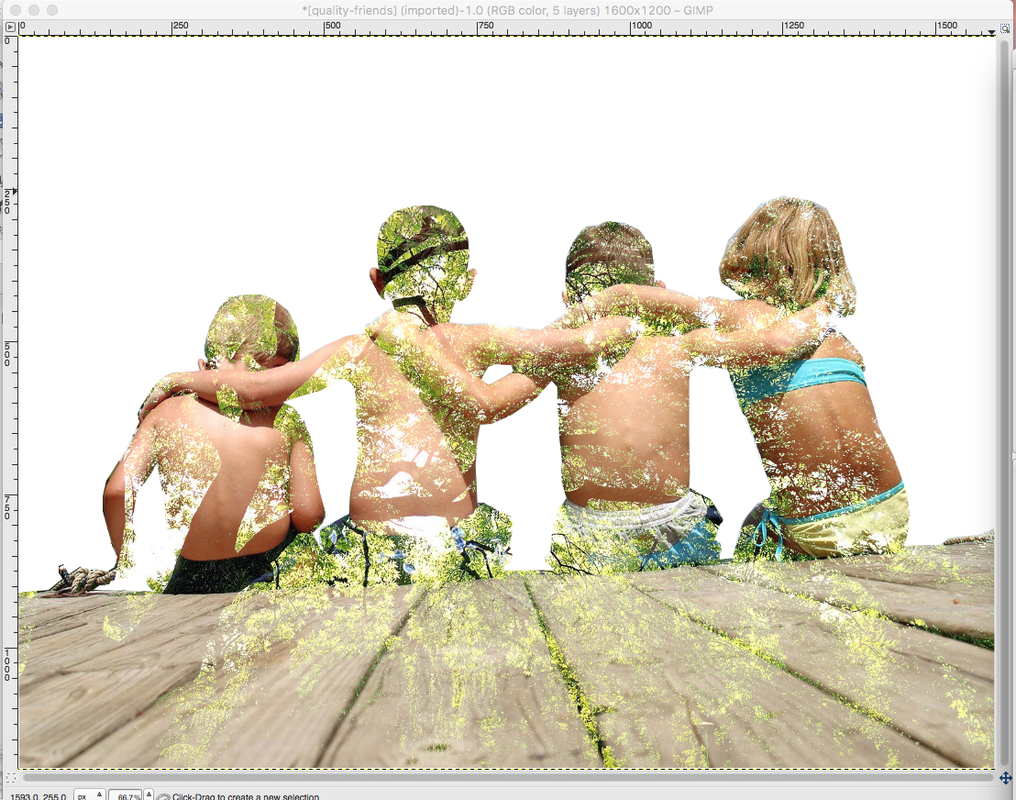
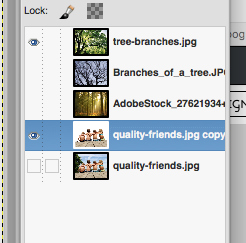
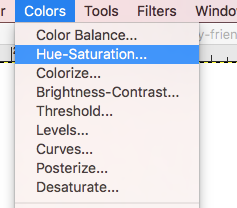
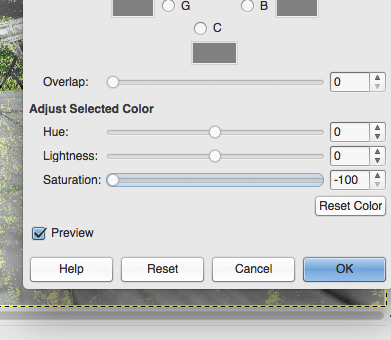
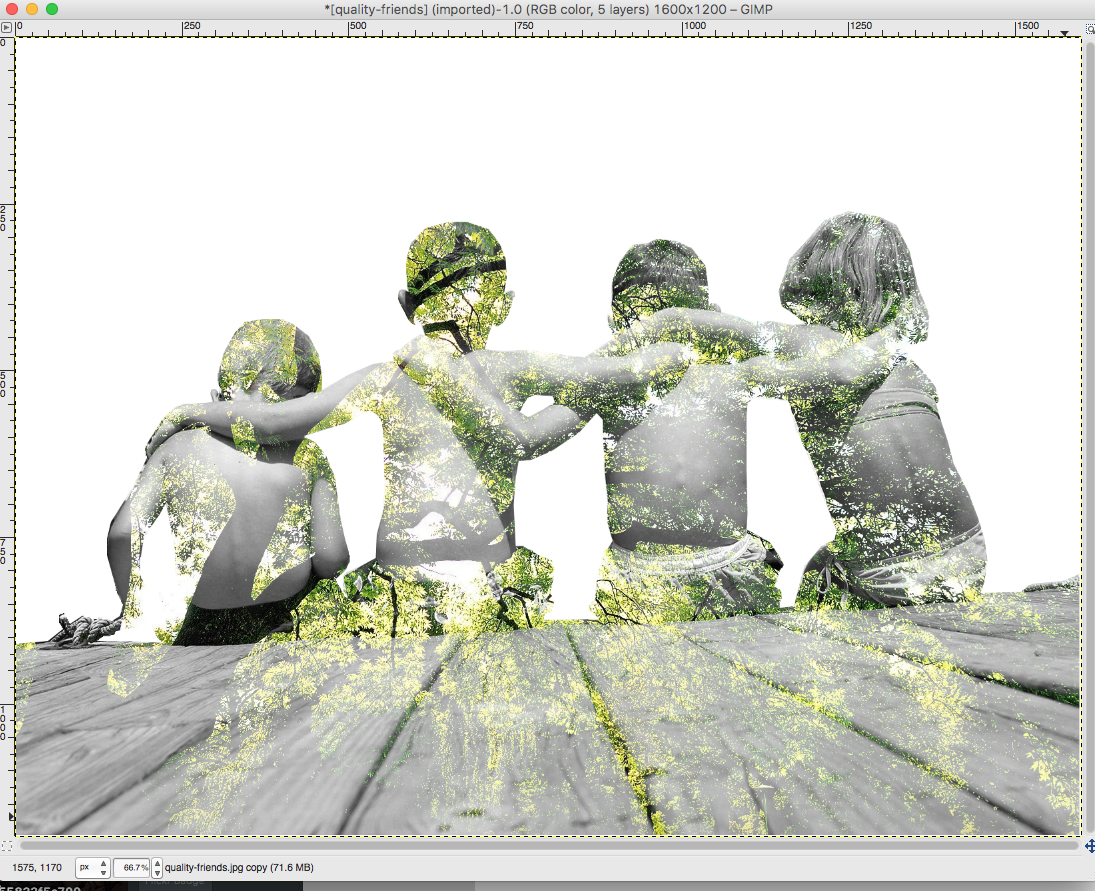
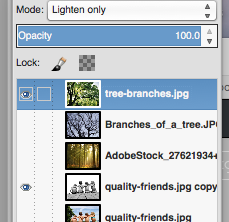
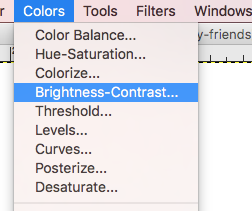
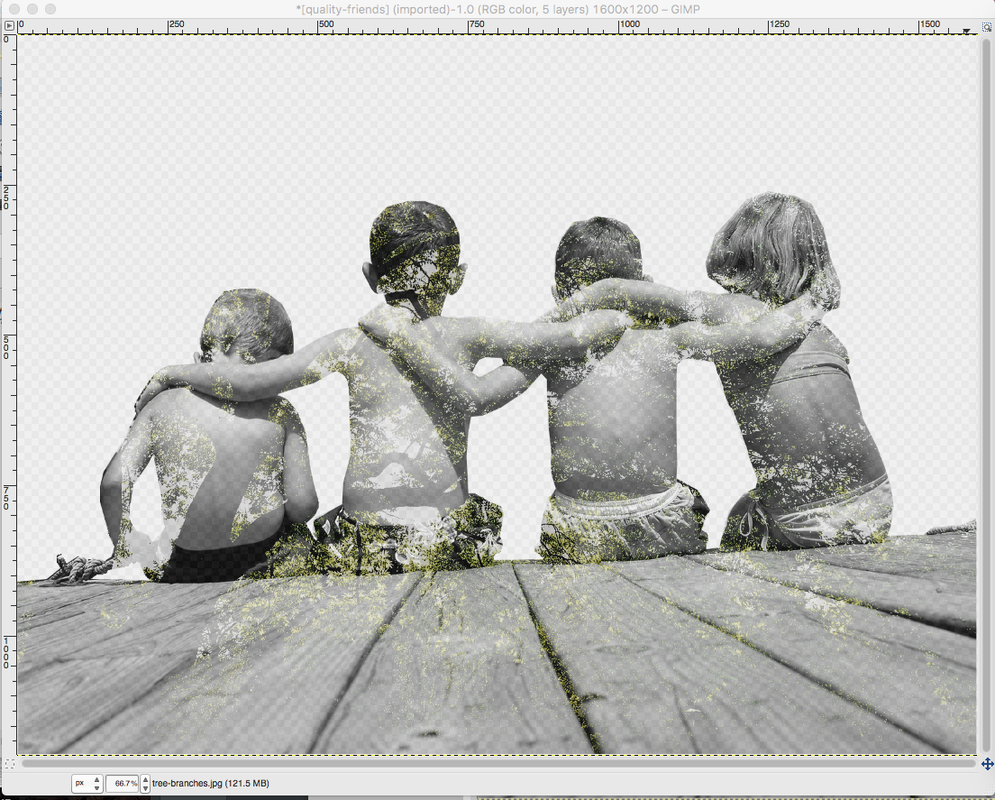
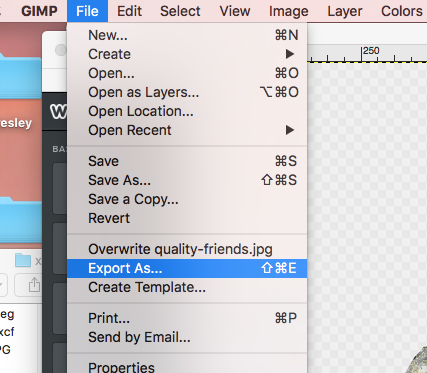
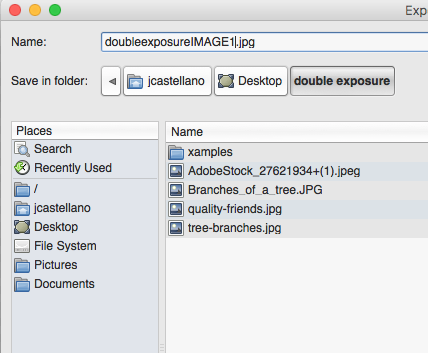
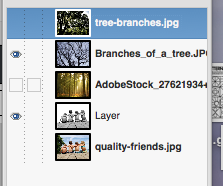
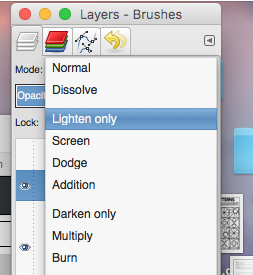
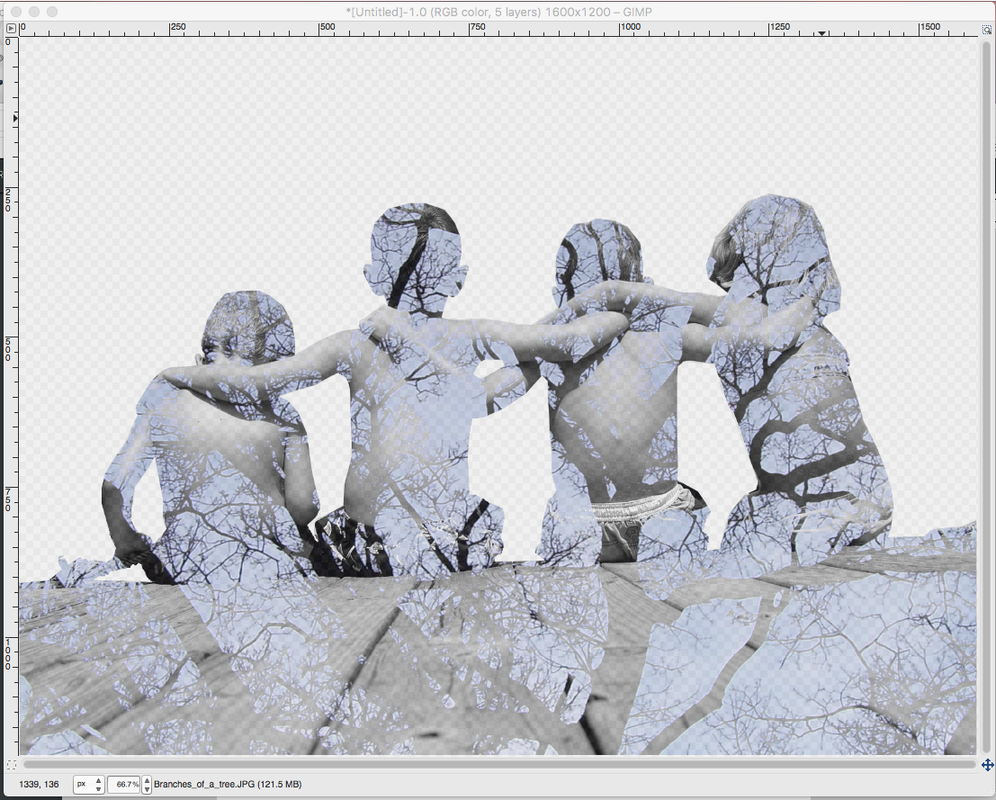
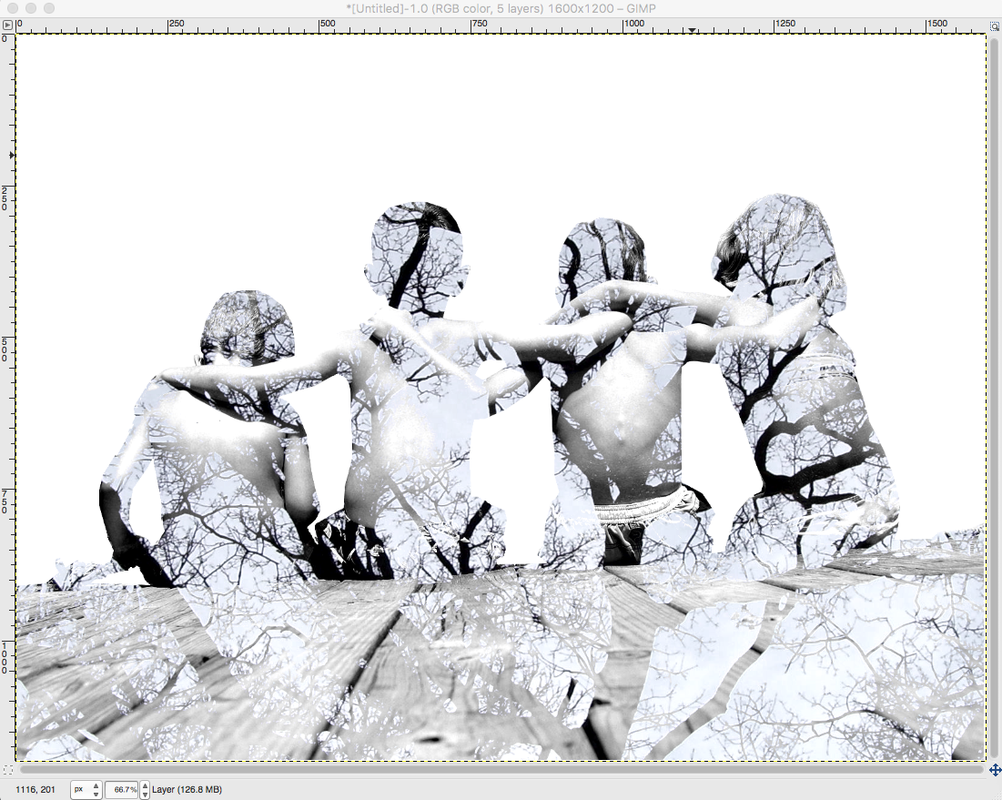
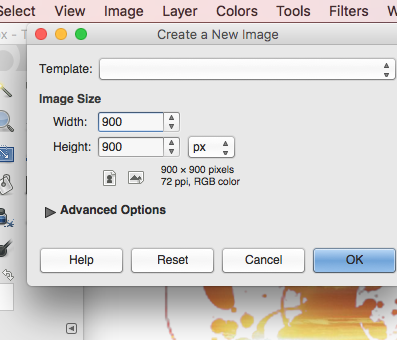
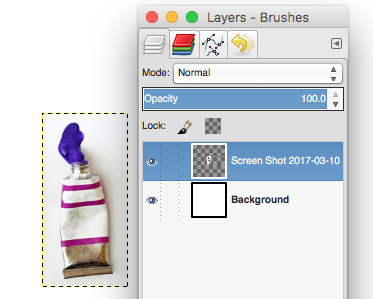
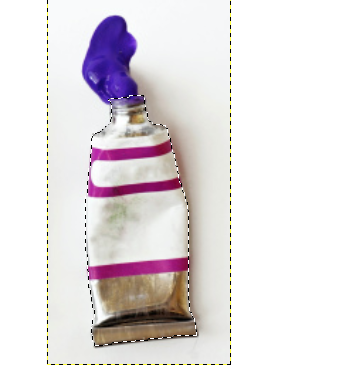
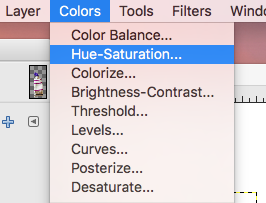
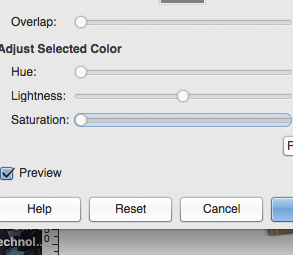
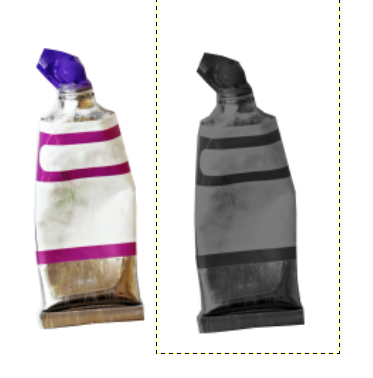
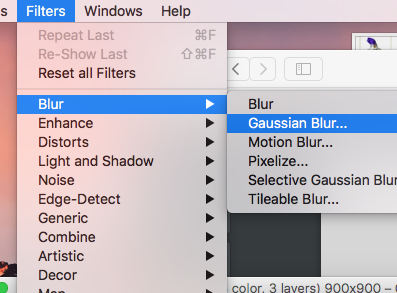
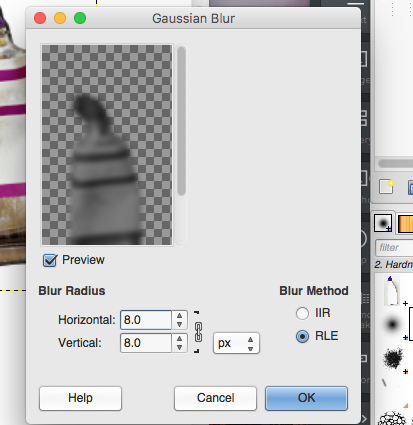
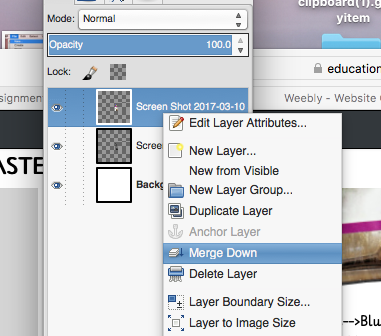
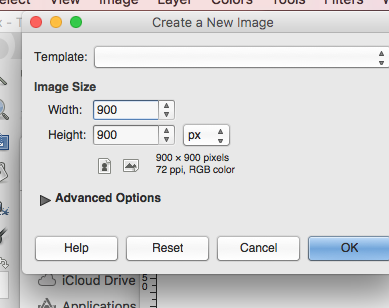
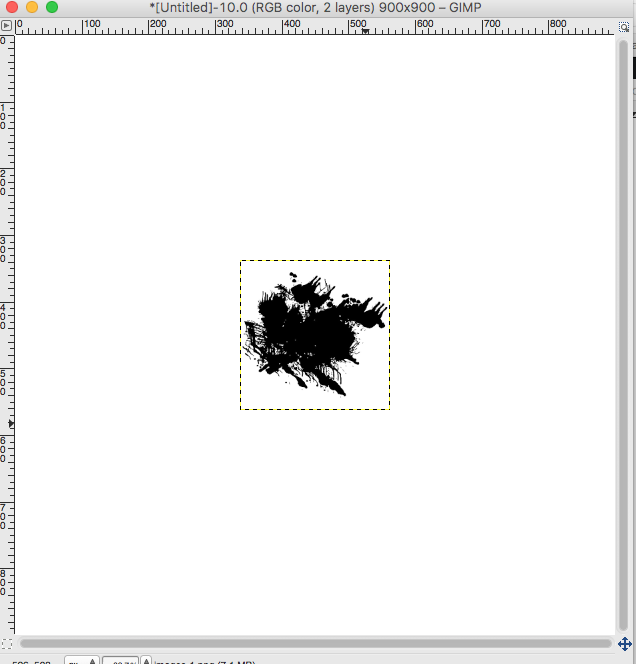
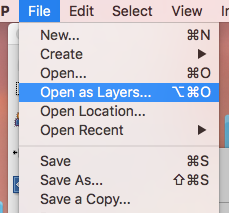
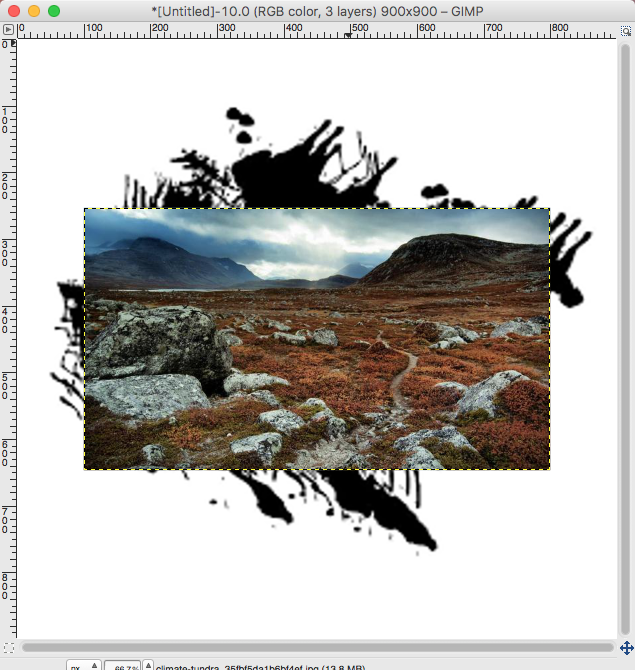
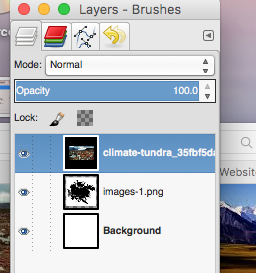
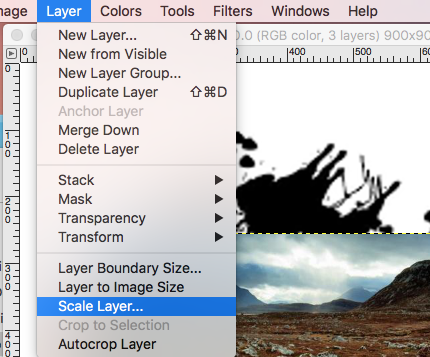
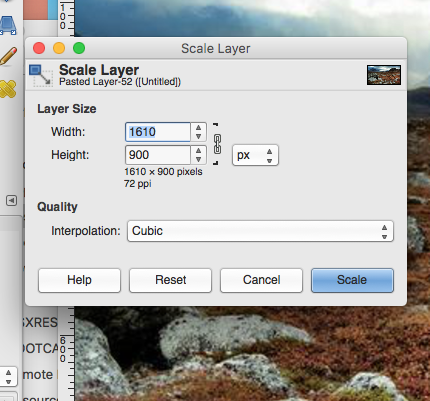
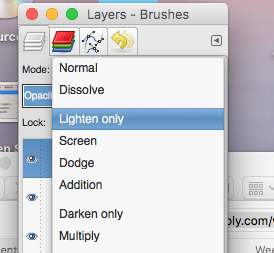
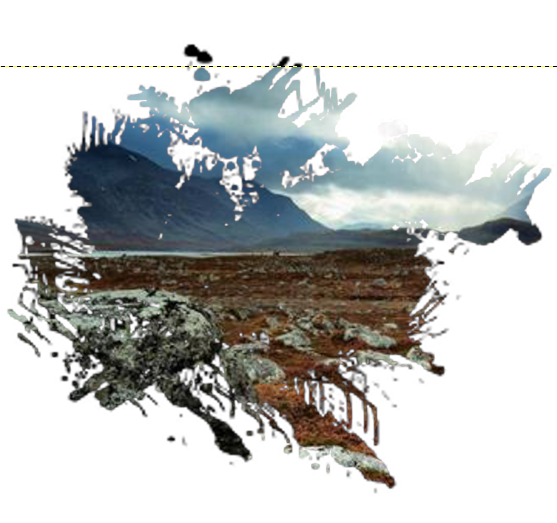
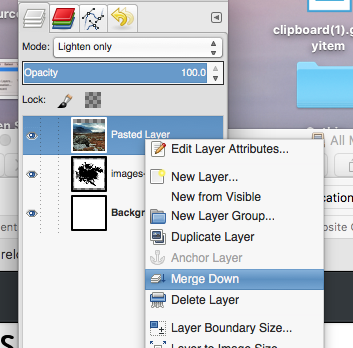
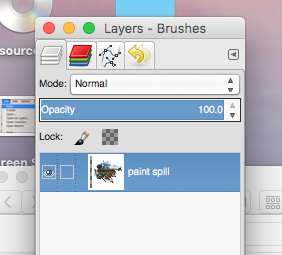
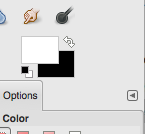
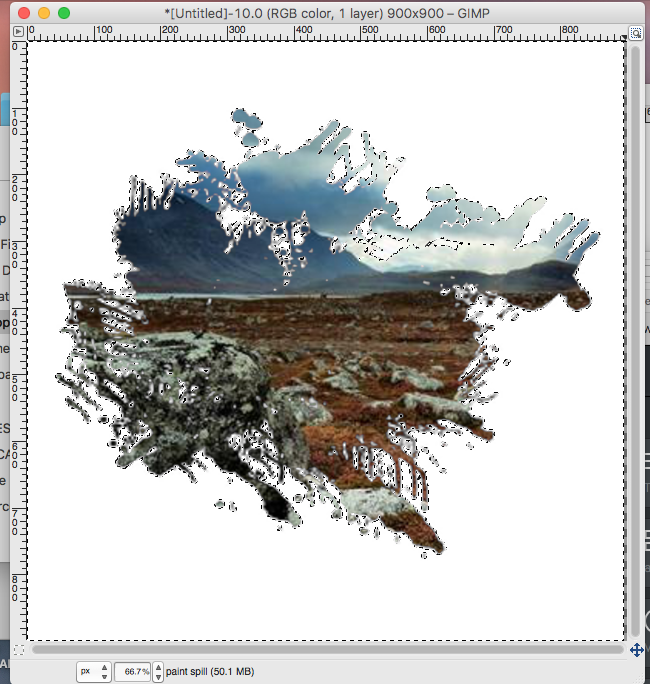
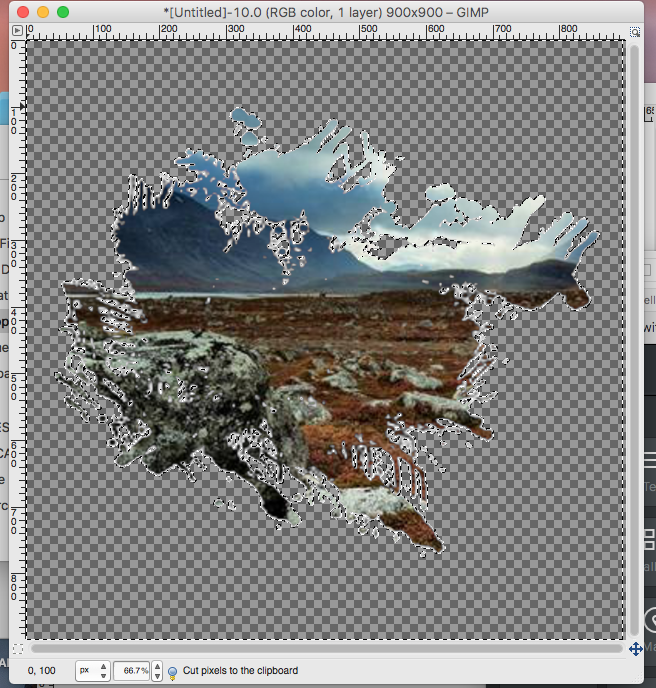
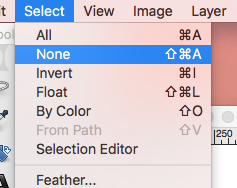
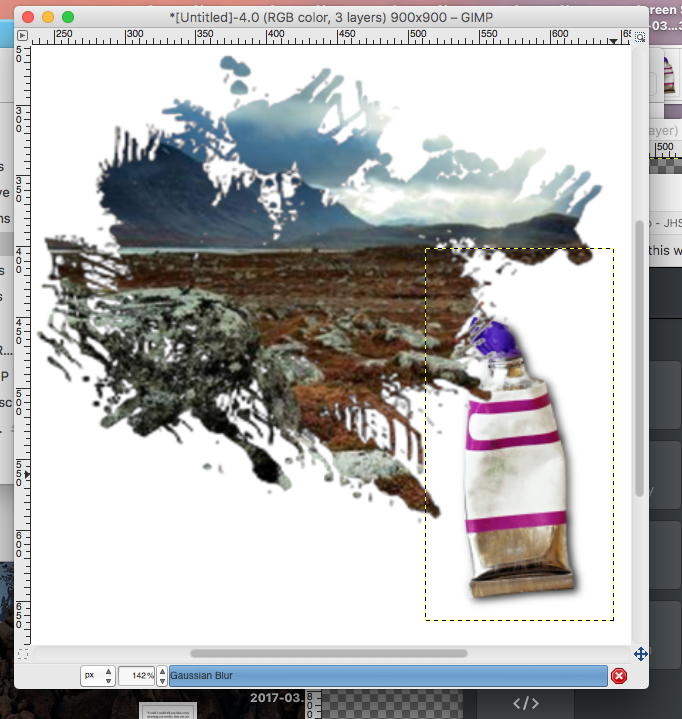
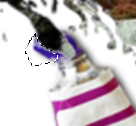
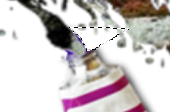
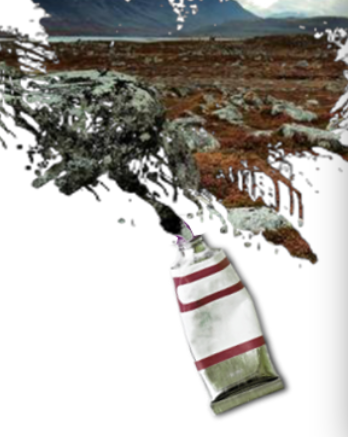
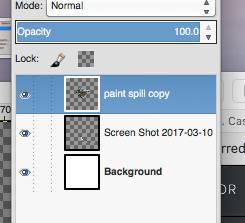
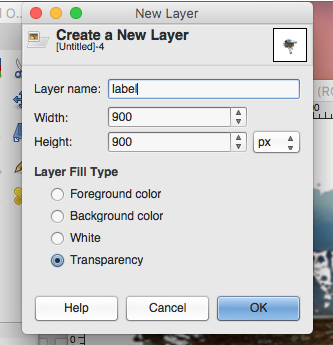
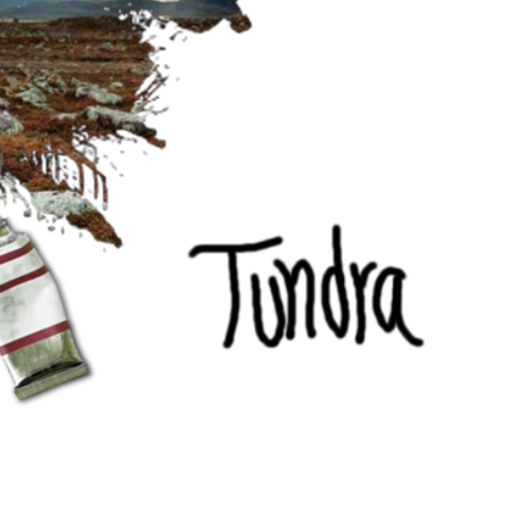
Double Exposure, or Multiple Exposure, is a photographic technique that combines 2 different images into a single image. This can be done using traditional photography as well as digital photography and through the use of a photo editing software such as Photoshop or GIMP. Here are some examples of Double Exposure Photography--feel free to google double exposure to see some other examples/ideas. 1.) To start this project you will want to find an image you would like to use. Try to find an image that is personal to you. This does not have to be a portrait of yourself but it could be. If you need to use Facebook that is fine....just don't dilly dally :) Below is the photo I am choosing.  2.) Open this Image in GIMP and Duplicate the layer. Hide the bottom copy. 3.) Using your lasso tool, remove some of the background. This will add nice contrast when we add our texture layer. Make sure you remove the negative space as well. 4.) Create a New Layer (Layer-->New Layer). Set the background to white. Make sure that the white layer is below the image you just cut out. 5.) Merge your cut out image with the white background layer. 6.) Now find at least 3 possible images for your textured layer. This could be a landscape, a city, another photo of your friend(s) or family. We want to have several different options to work with. Below are the three images I am going to try. 7.) Open all three images as layers in GIMP. Your first image should be on the bottom. You will only work with one of these images at a time so make sure to hide the other two. 8.) While selected on your texture layer change the Layer Mode to "Lighten Only" 9.) Now select your original image layer and change the Layer Mode to "Overlay". You won't notice much of a change after this step but it is important that the Mode is in Overlay. 10.) Go to Color-->Hue and Saturation. Play around with your saturation....I am choosing to desaturate my image completely. 11.) Do the same with your texture layer. You can desaturate your image partially as well so that there is a hint of color. The choice is yours. 12.) Now go to back to your original image layer. Then go to, Colors-->Brightness and Contrast. Play around with the Brightness and Contrast Toggles until you get a look you want. 13.) Do the same for your texture layer. 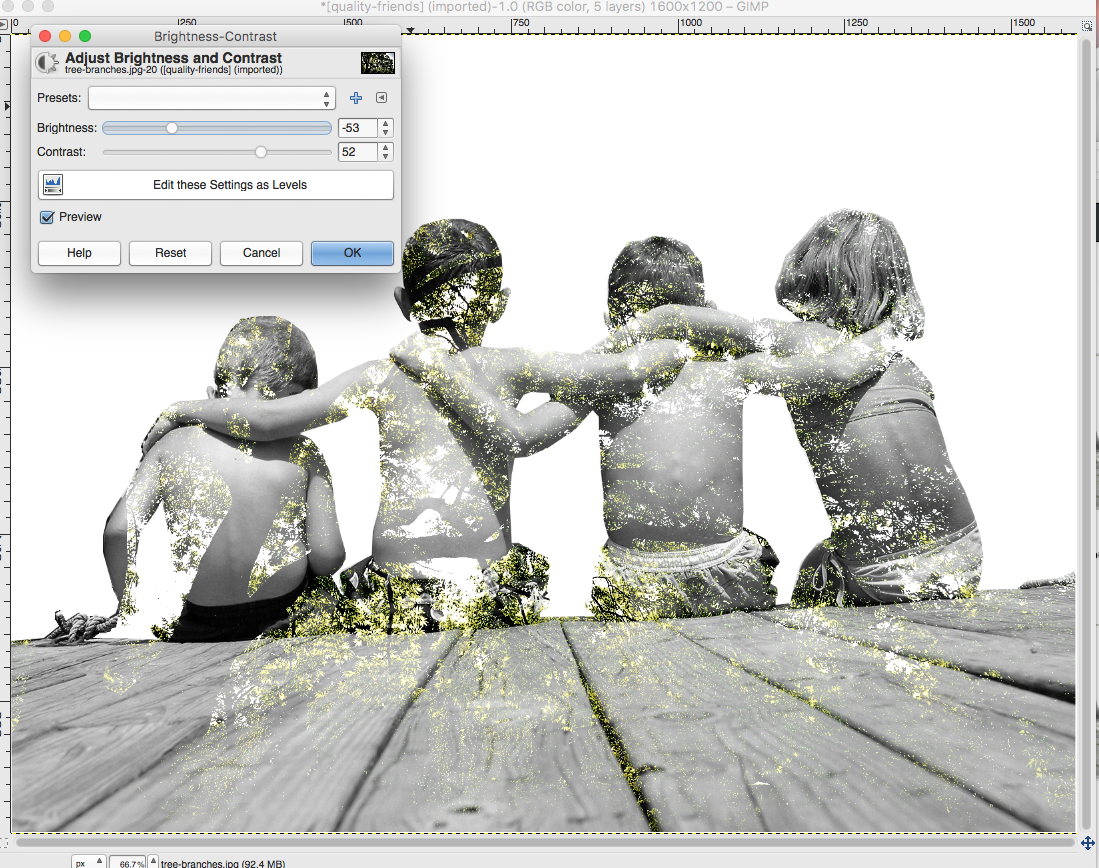 14.) Lastly, play around with the opacity of both layers until it looks how you would like it. 15.) You are finished with your first image. Go to Export-->As to save this image as a .png. Be sure to export it to a place you will be able to find later. 16.) Hide your current texture layer and unhide a different layer. Set the Layer Mode to "Lighten Only". 17.) Adjust your Colors, Saturation, Contrast, and Opacity (Steps 10-14) just like you did before until you have the look you want.  18.) Export it as another .png or .jpg and repeat this process with your final image. When you are finished you should have at least three double exposure images. Send all three to me and upload to your Website Portfolio. For this project you will be working with a variety of layers. We will be creating a shadow effect as well as a double exposure effect. You will be setting a scene inside of a paint splatter and labeling the tube of paint. See my example below. 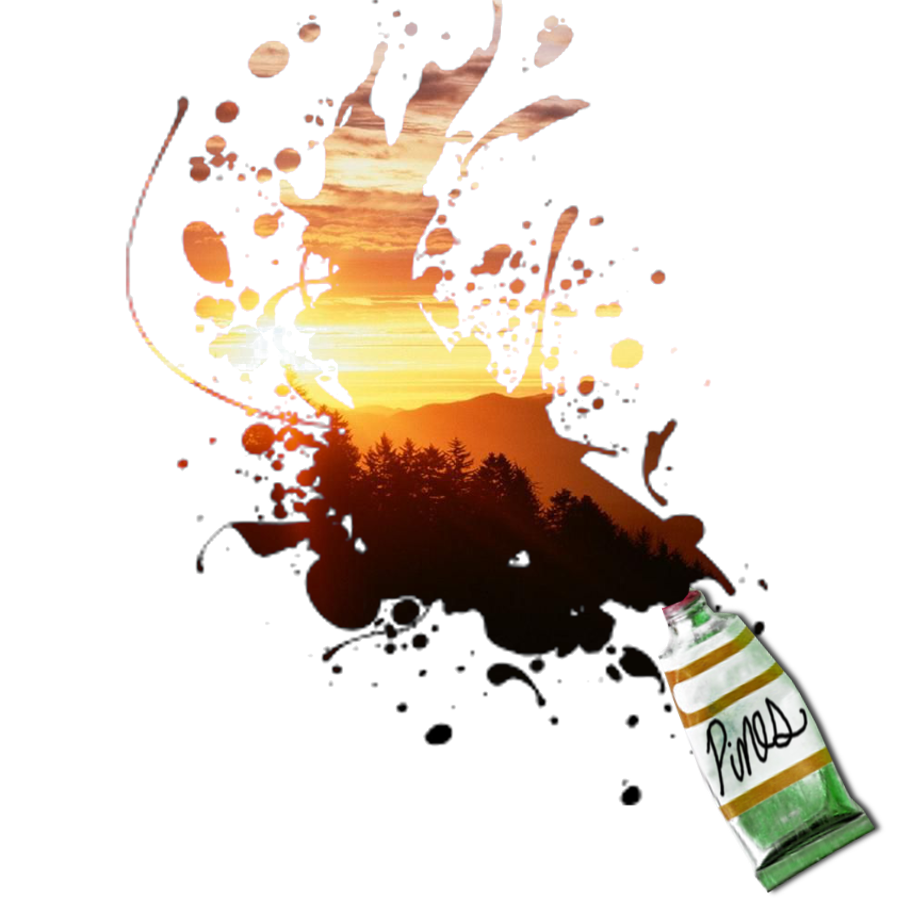 Step 1: Paint Tube and Drop ShadowFirst choose a paint tube to start with. You can find your own as well....otherwise save one of my images below. 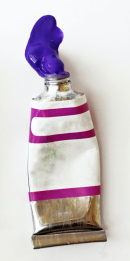 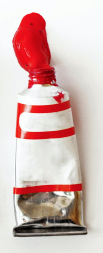  Create a new file in GIMP (the size of your image should be 900X900 pixels) Go to File-->Open As Layers and open the paint tube you saved (you should now have two layers--1 your background and 2 your paint tube) Using your Lasso Tool, select your paint tube. Invert your selection and go to Edit-->Cut to delete the background......keep a little bit of the paint. Duplicate your paint tube layer. Desaturate the bottom paint tube and bring down the lightness completely (should be VERY dark) Stack the paint tube layers on top of each other (slightly offset so to resemble a shadow) 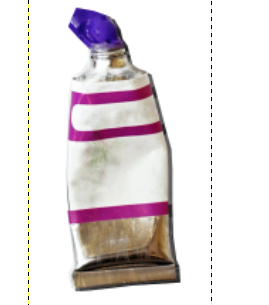 On you bottom paint tube layer....go to Filters-->Blur-->Gaussian Blur. Play around with your blur settings until you get a blur that is right for you. Your paint tube should now have a shadow under it. Merge your top paint tube onto your drop shadow so you are back to having only a background layer and a paint tube layer. Step 2: Paint Splat and Scenery Double ExposureChoose a paint splat from below that you would like to use. .(you can also search for your own image) 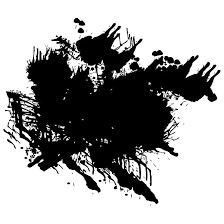 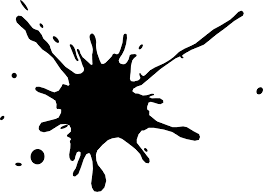 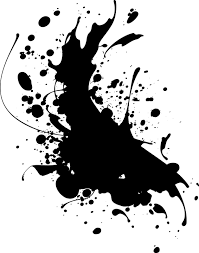 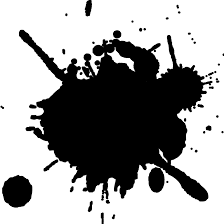 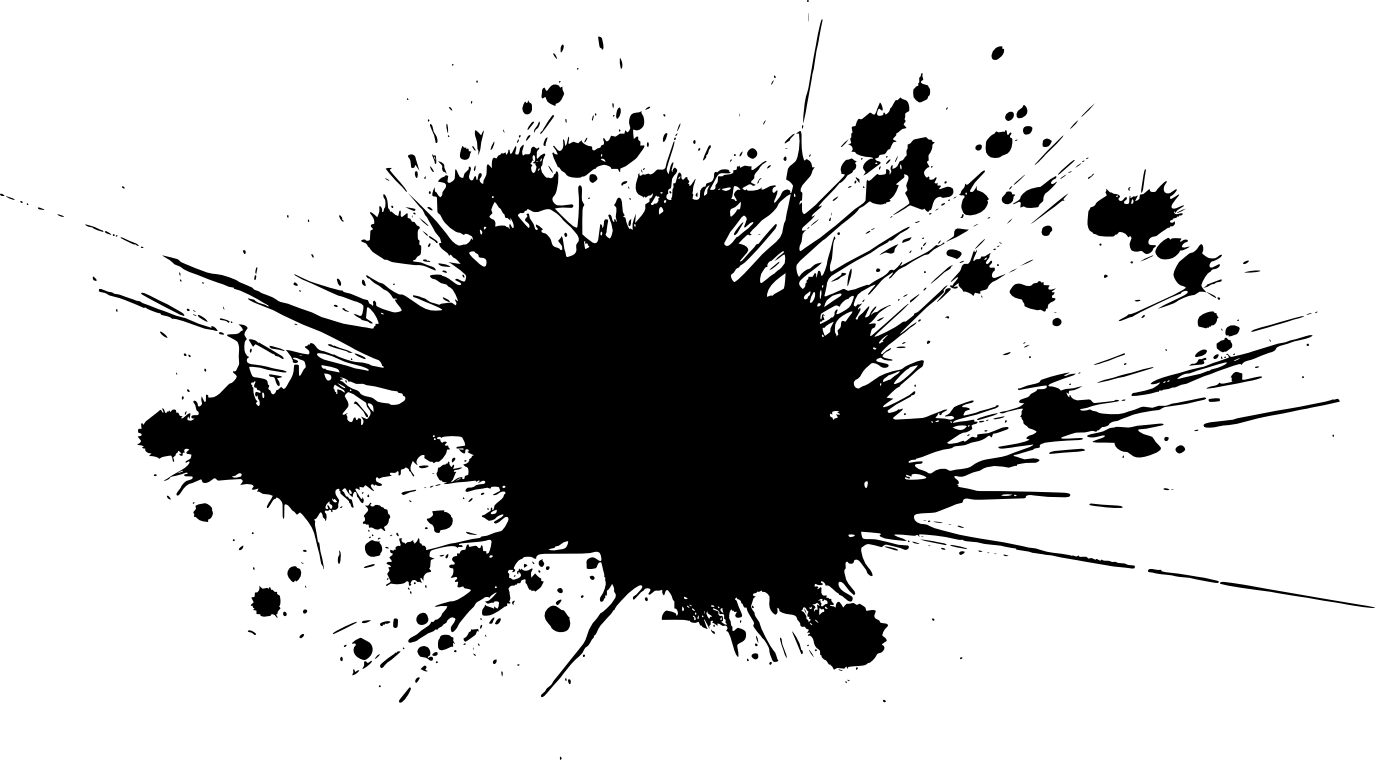  Create a new image. File-->New set your pixel size to 900X900 pixels. Go to File-->Open as Layers and open your paint spill. Adjust the size of your paint spill so that it fills most of your image. Search for a HIGH RESOLUTION (900x900) image of what you would like to be "pouring out" of your paint tube. Save it to your computer. Go to File-->Open As Layers to open it to your paint spill image. Make sure your image is the top layer. Change the size of this layer to so that its Height is 900 Pixels. Layer-->Scale Layer. Now the image will fill your window. In your layers window, set the layer mode to Lighten Only. Use the move tool to position your image so it fits just right inside of your paint splatter. When your paint spill looks right, MERGE all of your layers down so that you have one layer left. Use your "Select By Color Tool". Switch your Foreground and Background colors so that your Foreground color is White. Click anywhere on your white background to select all of the white. Edit-->Cut to delete the white. Step 3: Putting it all TogetherGo to Select-->None to deselect everything. Drag your Paint Spill Layer over to your Paint Tube image. Using the Move, Scale, and Rotate Tools, position your paint spill and tube how you would like. 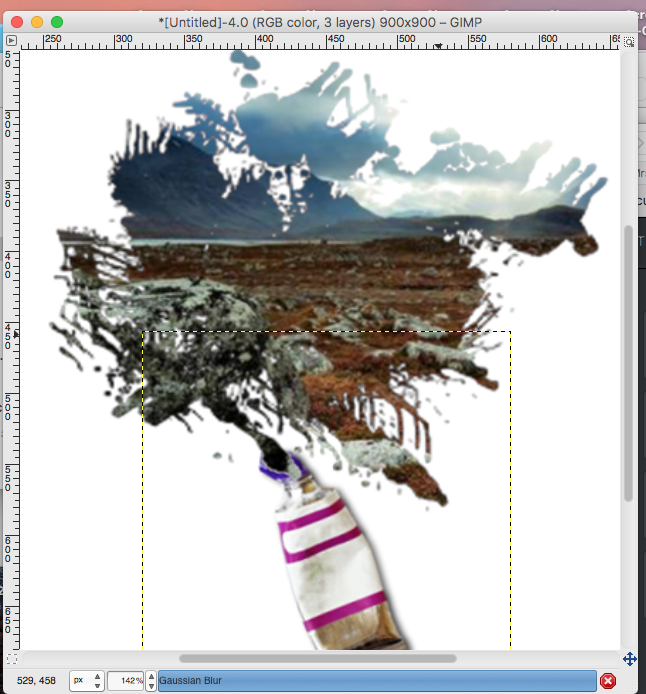 Use your lasso tool to select and delete any part of the paint coming out of the tube that is showing. While selected on your Paint Tube Layer. Go to Color-->Hue and Saturation. Play around with the toggles to change the paint tube to colors that fit with your image. Make sure you have your paint spill layer active, use your Smudge Tool to blend your paint layer so that it looks as though it is coming out of your paint tube. Your image should be similar to this. 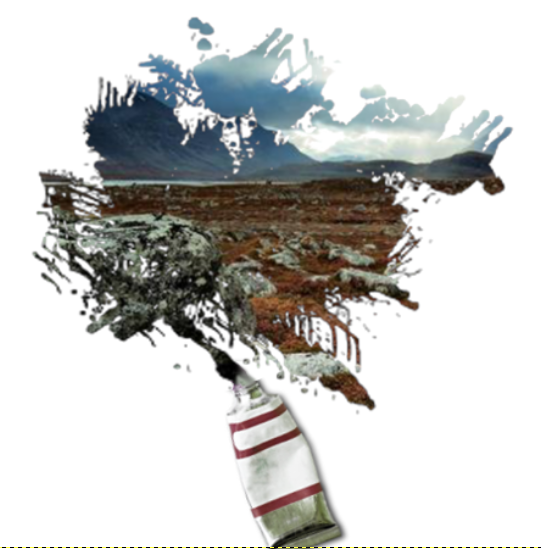 Step 4: Creating the LabelI chose to use the brush tool and handwrite the label. You can also use the text tool. The handwritten look can be a nice touch. Create a new Layer (900X900 Pixels)--Make the background set to Transparency. With your Paintbrush Tool write the name of your paint tube. Go to Layer-->Autocrop Layer to make it easier to manage. Scale, Rotate and Move the label to fit your paint tube. 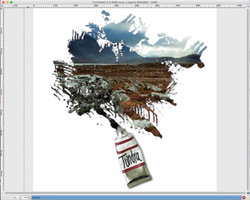 File-->Export As to export the file as a .png or .jpeg and email to me!
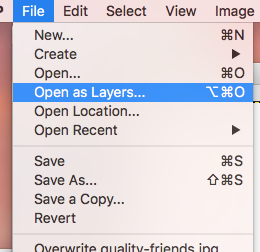
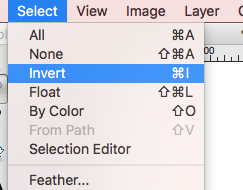
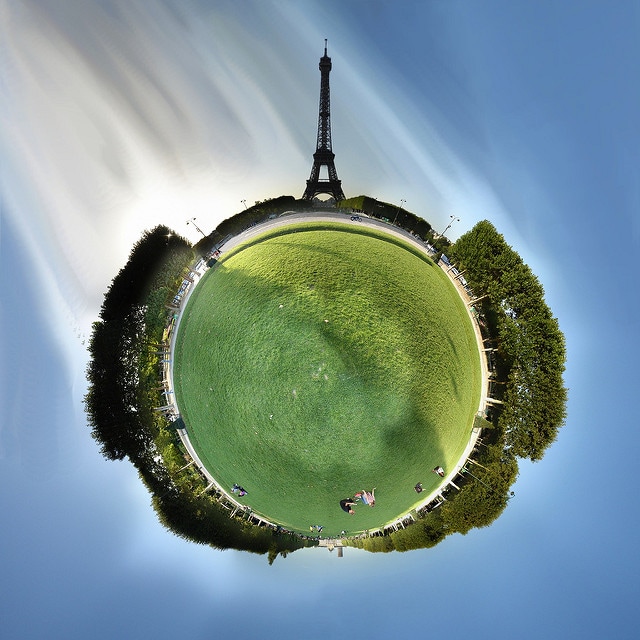
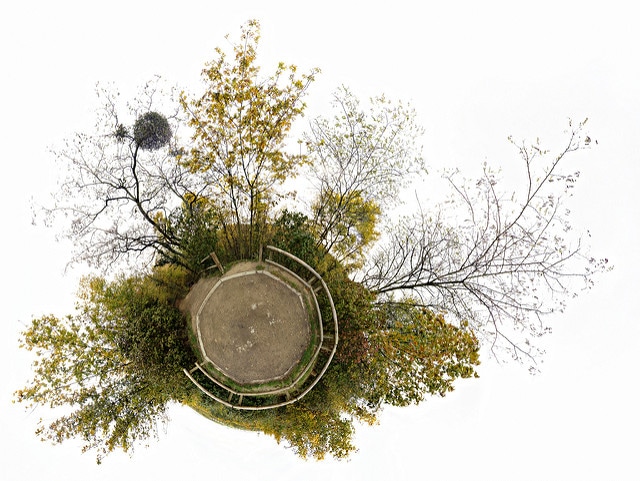
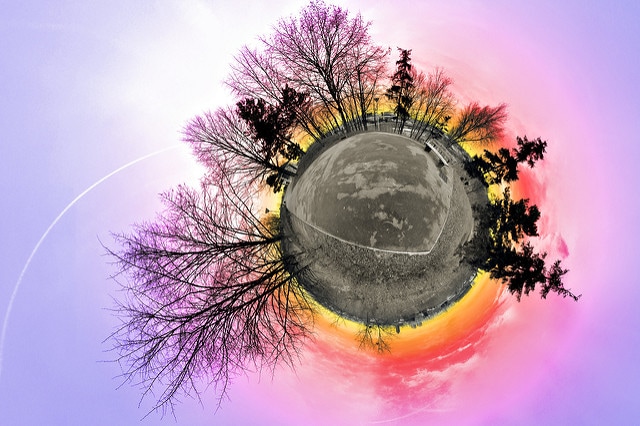
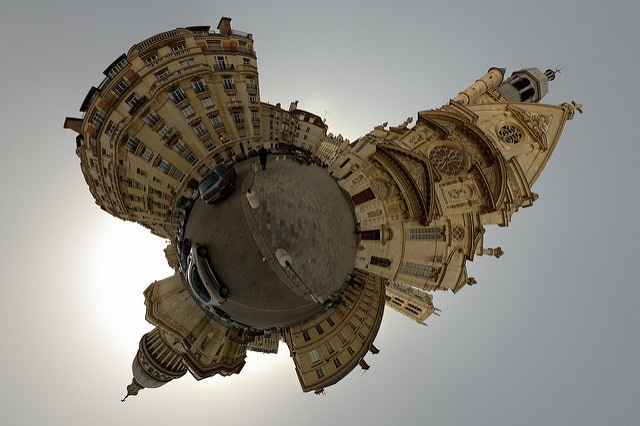
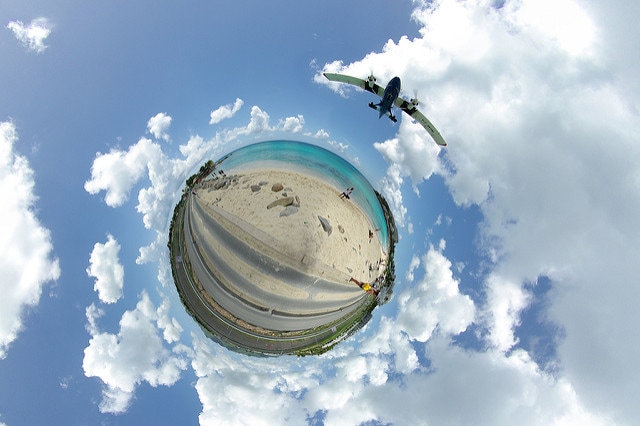
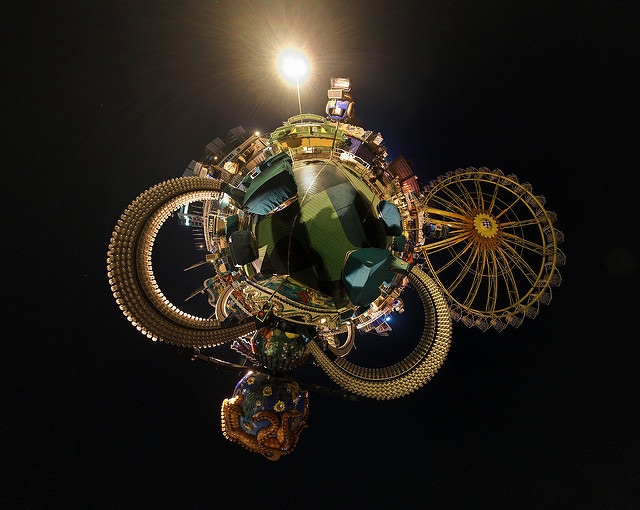
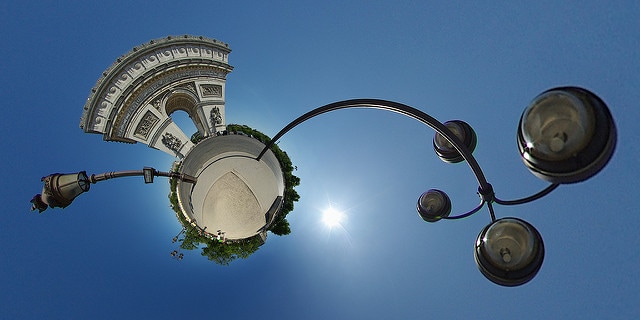
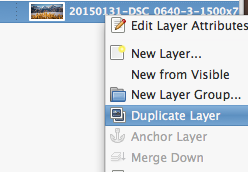
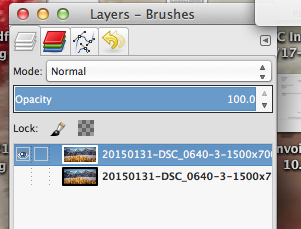
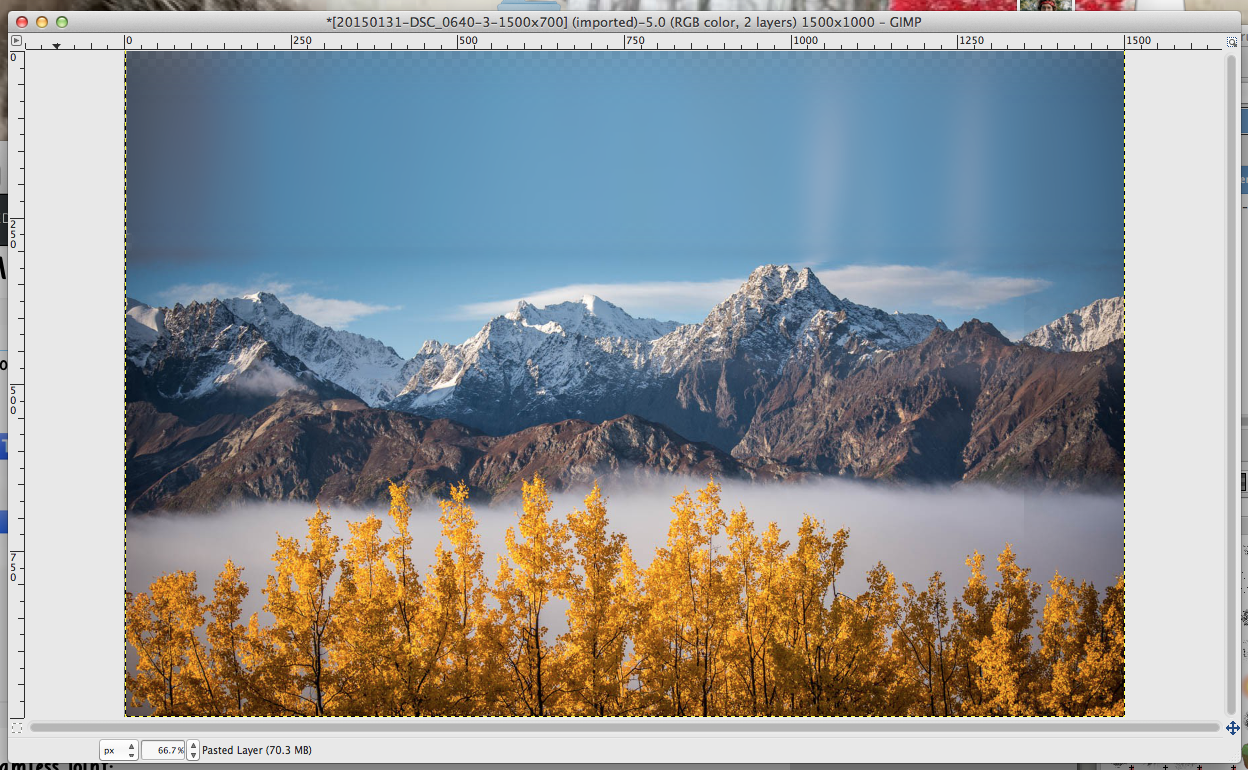
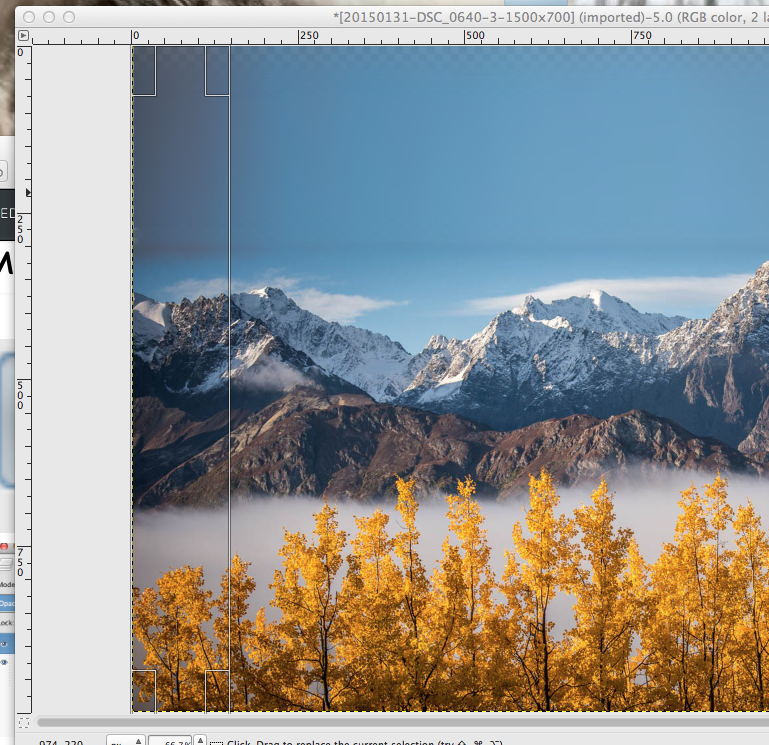
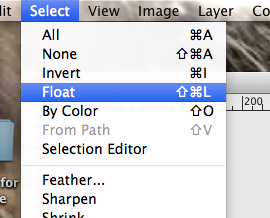
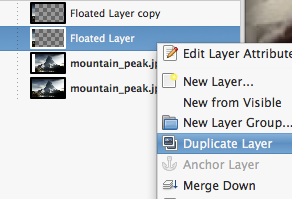
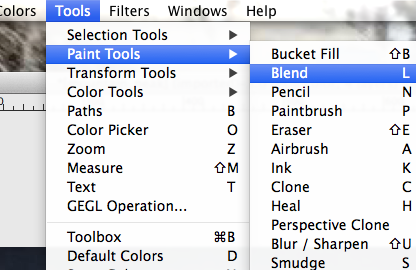
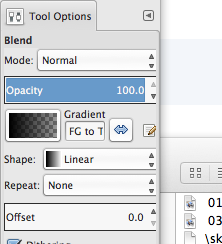
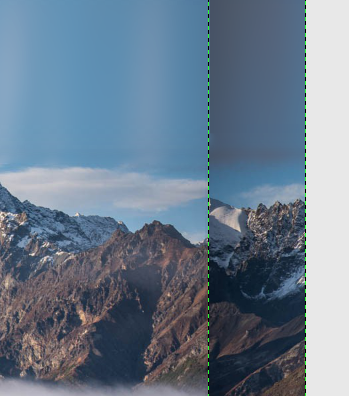
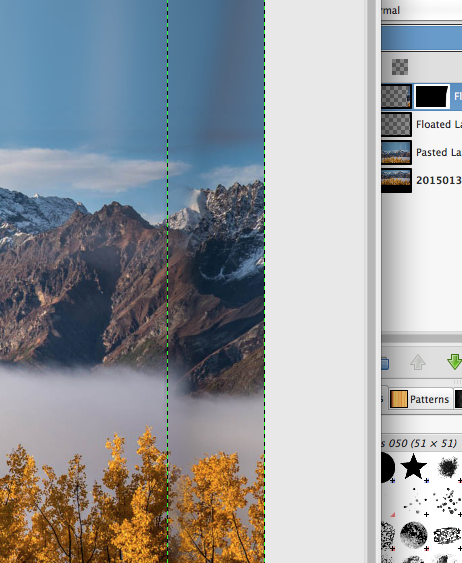
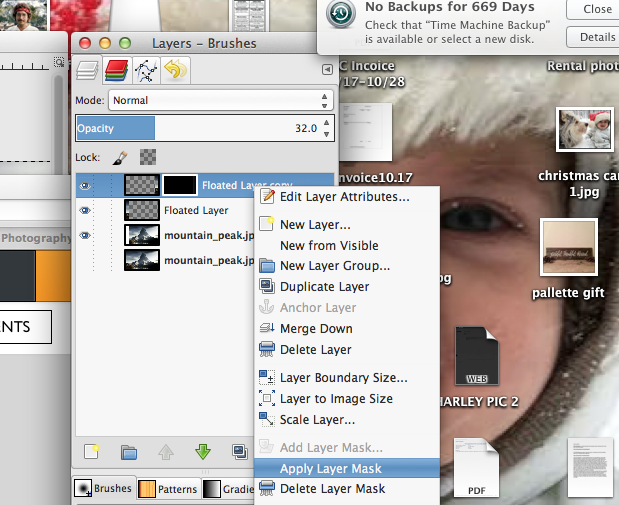
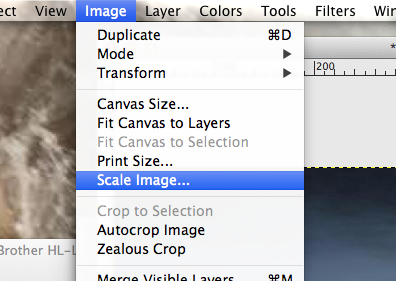
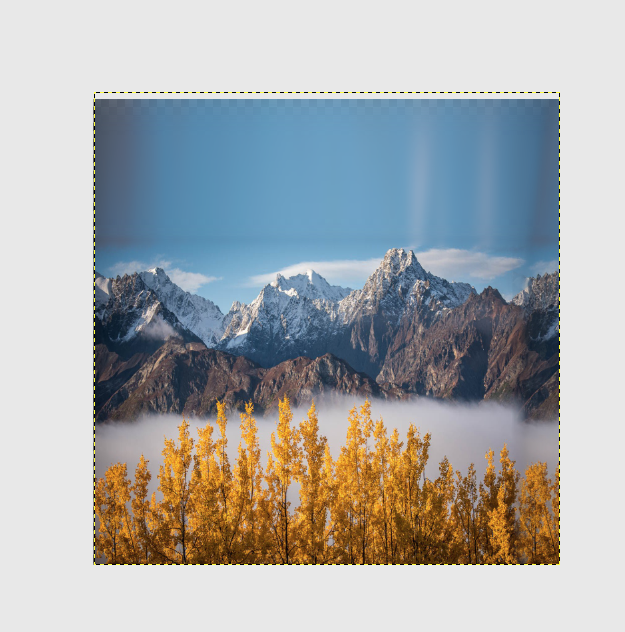
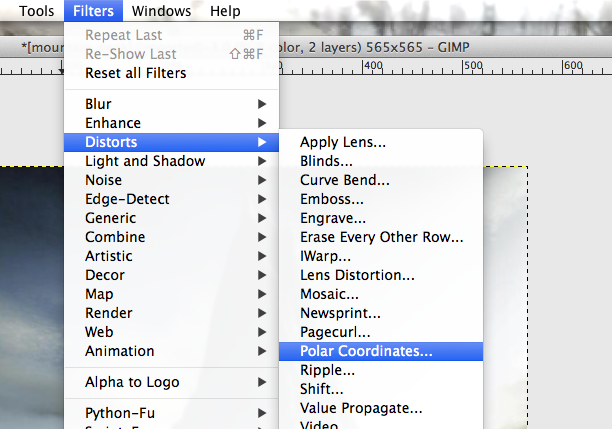
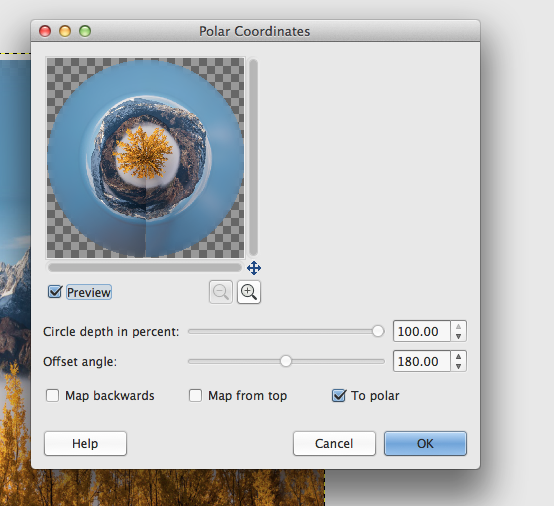
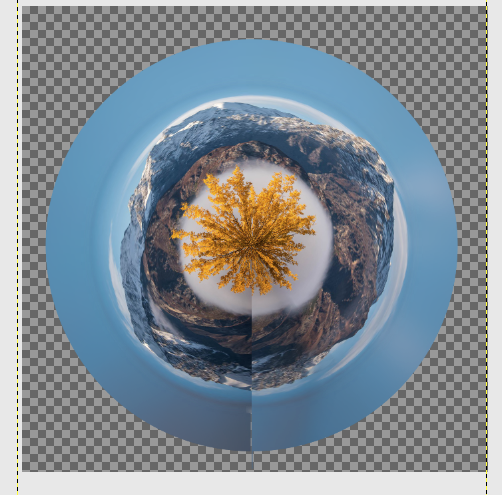
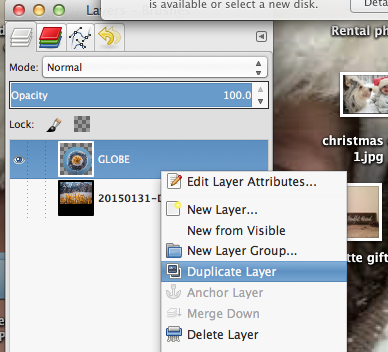
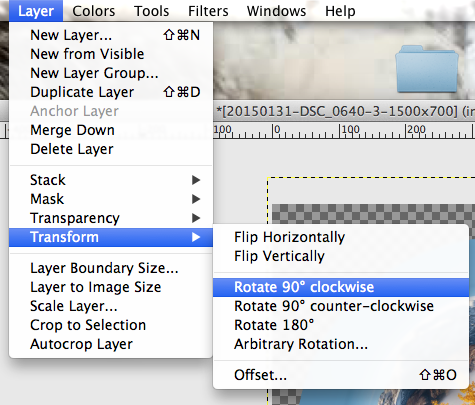
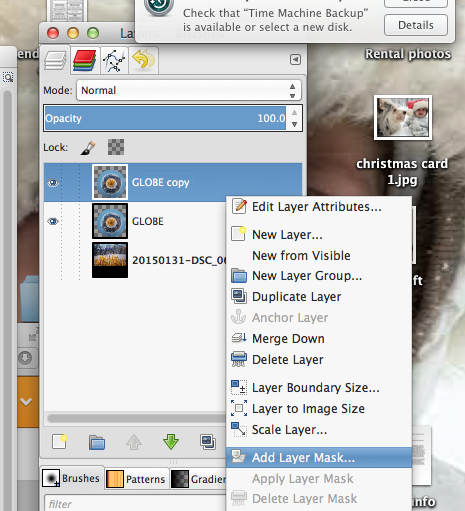
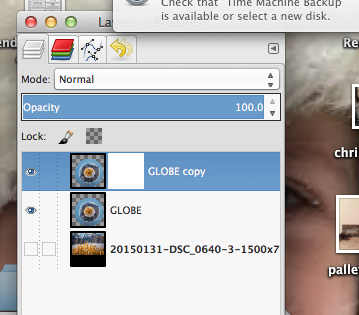
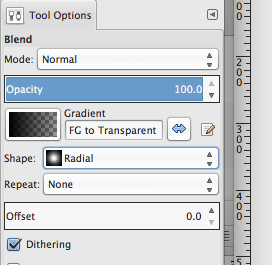
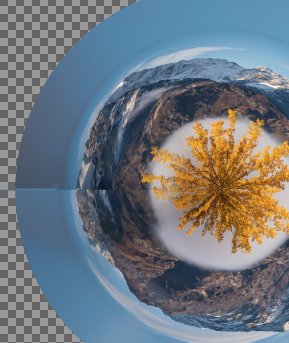
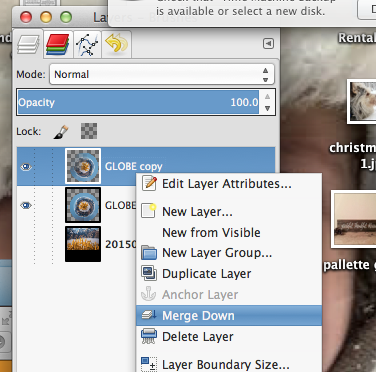
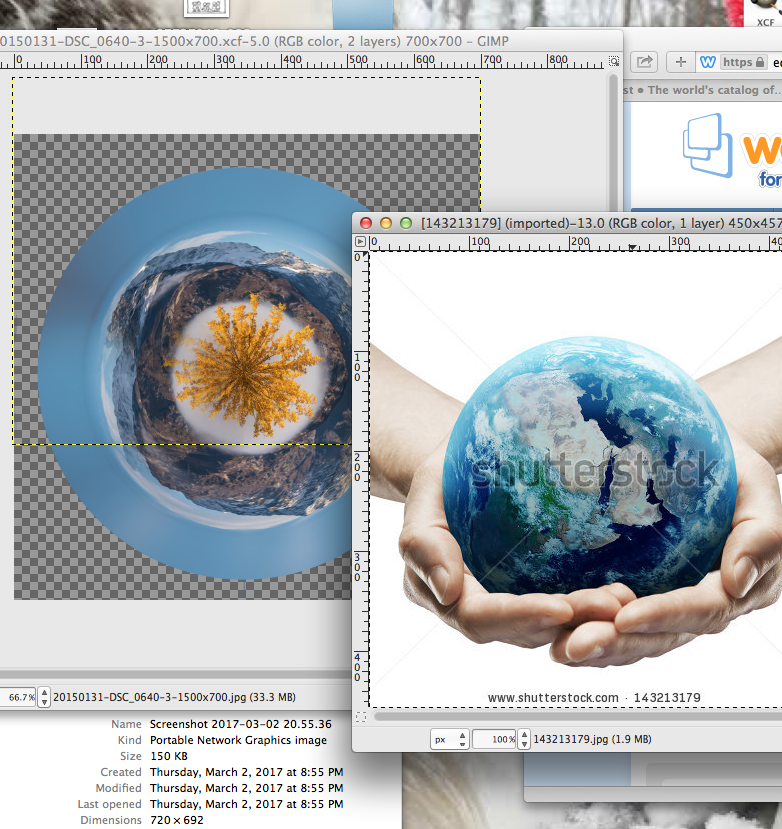
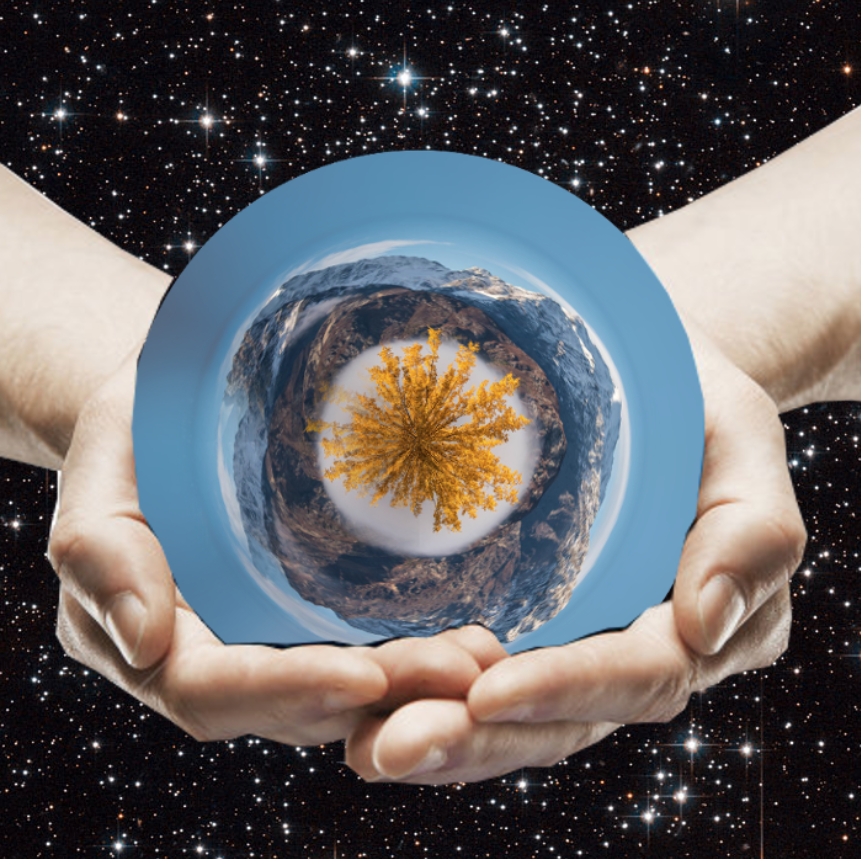
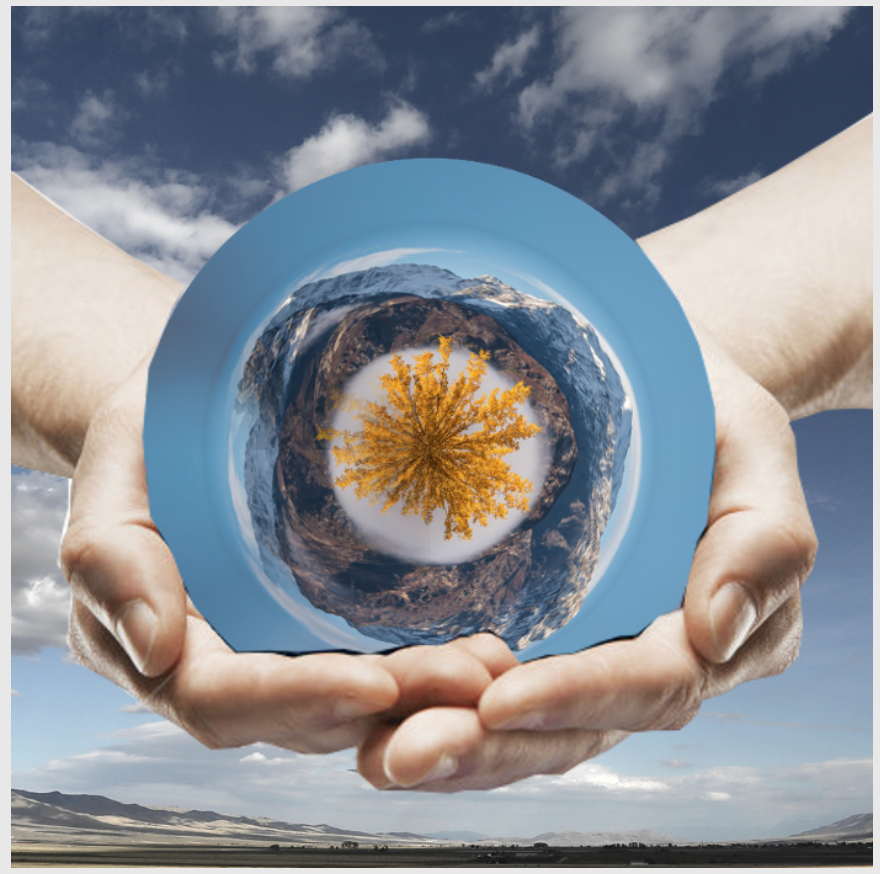
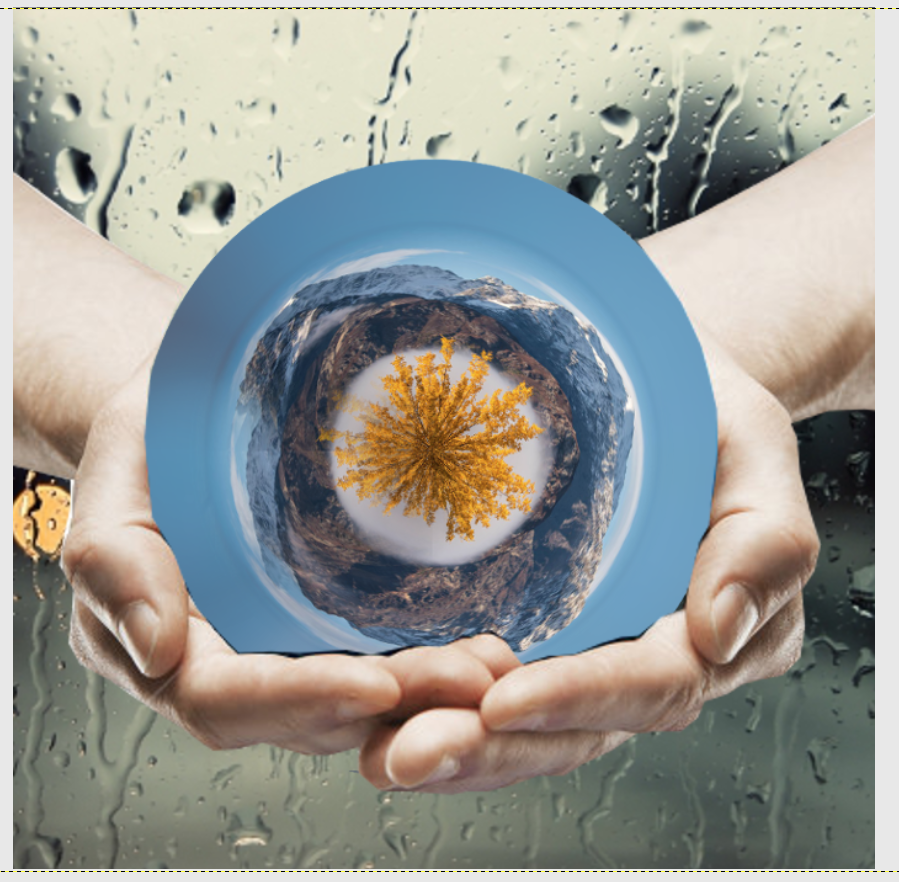
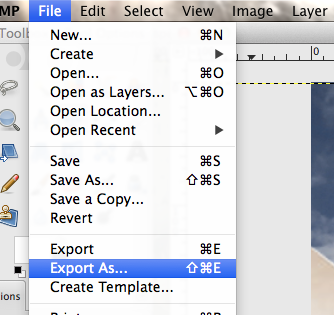
For your 3rd GIMP Project you will be creating Stereographic projection, which takes a standard photograph and stretches it around in a circle creating a globe or planet like image. Take a look at a few examples below. You will need to start off with finding an image you would like to use. Please not that you will want an image where the scenery stretches across the entire photo....otherwise when you wrap it in a circle, you will have large gaps. Also, make sure you choose an image where nothing is cut off on the sides. See an "OK" examples and "NOT OK" example below---you basically want the left and the right side to be similar looking (this will be easier to line things up in the end). ***REMEMBER TO LOOK AT RESOLUTION!!!!!!! Open your image in GIMP. Duplicate your background layer and hide it (Uncheck the Eye Icon) Crop your image so you have an even balance of sky and land (if necessary) Seamless Joint: With your Rectangle Selection tool. Select a rectangle from top to bottom on one side of your image. go to Select-->Float. Create a New Layer and Duplicate it. Move the Floated Layer Copy over to the other side of your image. Add Layer Mask to the Floated Layer Copy (right or control click on the layer and select "add layer mask") Double check that your layer window looks like this. 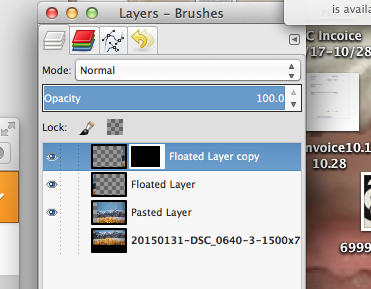 Using the BLEND Tool (Tools-->Paint Tools-->Blend Tool) click and drag in short spurts from left to right across the seam between your original image and your floated layer. Be sure to check your tool settings (Gradient should be FG-->Transparent or black to transparent, and the shape should be linear.) Be sure to adjust your opacity so that the layer looks blended with your image. 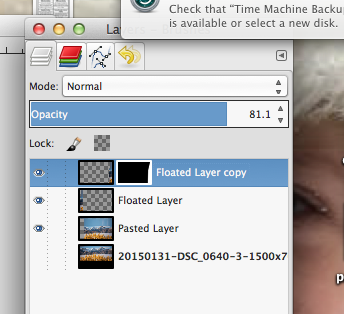 The right side of your picture should now resemble the left side. 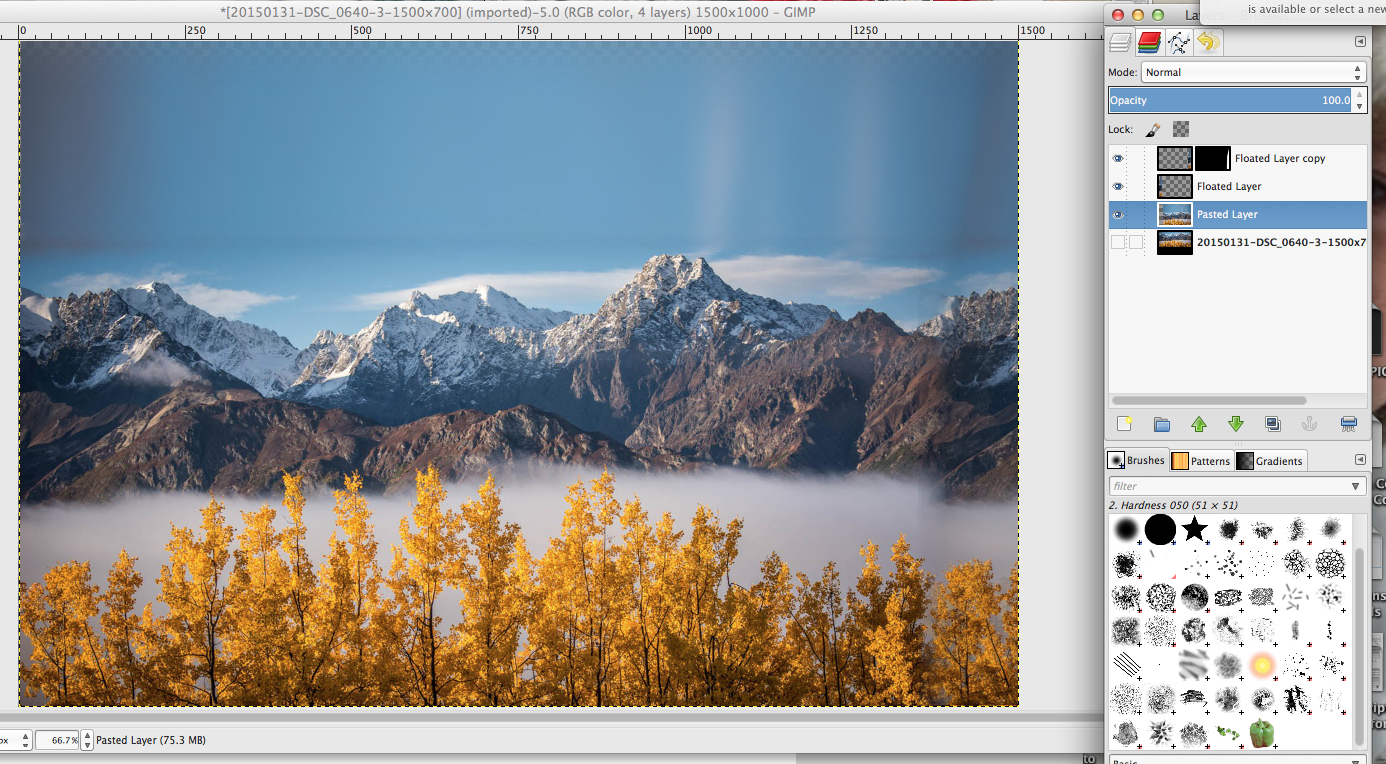 Apply Layer Mask (right/control click-->apply layer mask) Merge down your layers until you are back to two layers....your original image (hidden) and your edited version. Resizing to a square image: We will need a square image so go to IMAGE-->SCALE IMAGE Uncheck the proportions lock. Change your longest dimension to match your shortest (i.e. 1064X700 Pixels-->700X700 Pixels) To make the "Planet" go to FILTERS-->DISTORTS-->POLAR COORDINATES...settings are at 100 and 180 (See image below)....make sure TO POLAR is the only box selected.
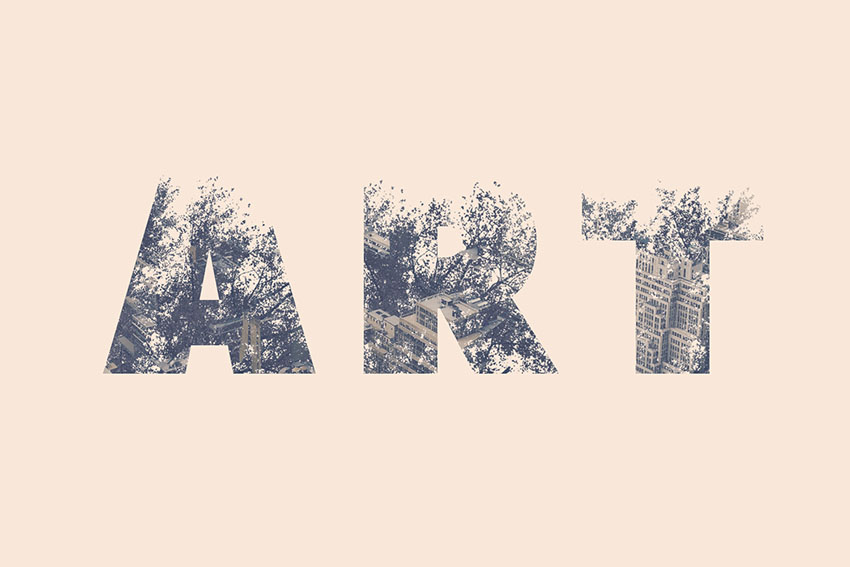
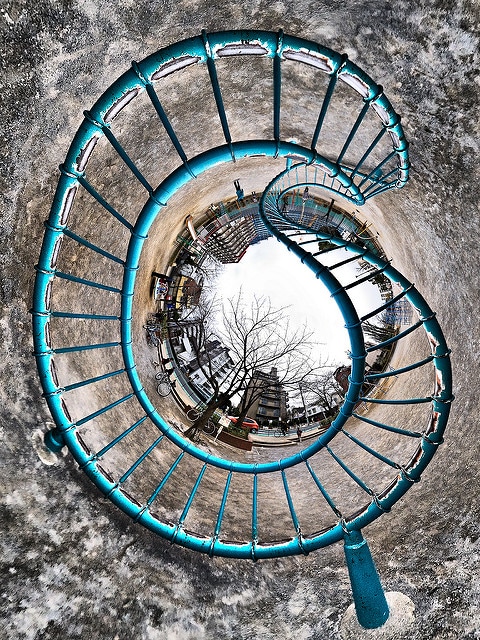
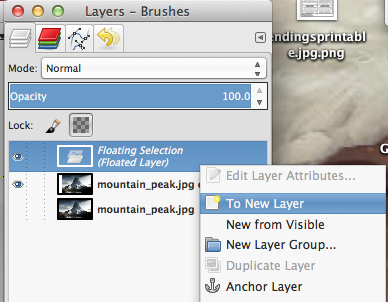
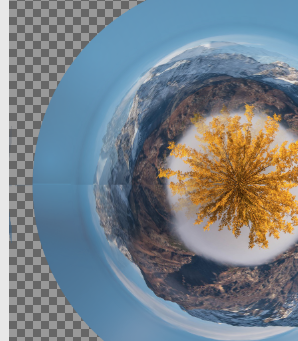
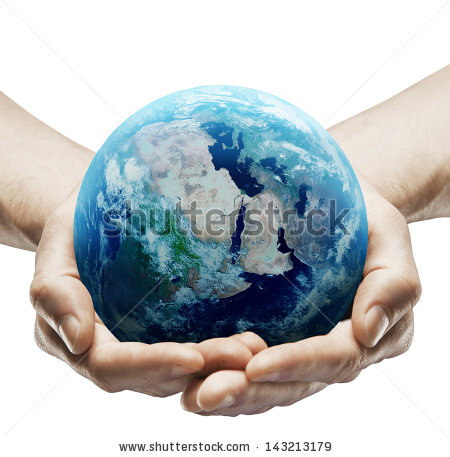
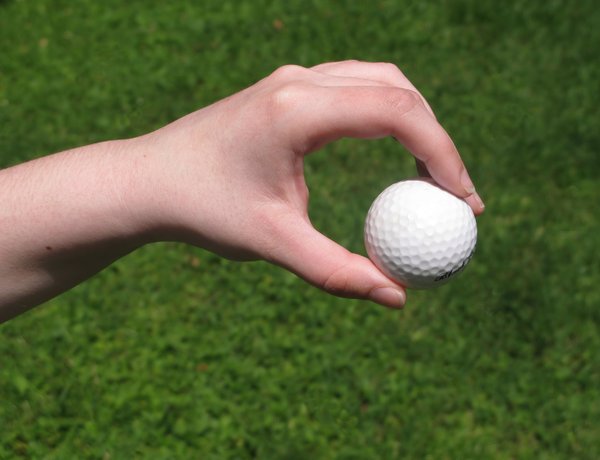
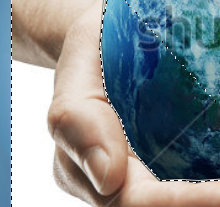
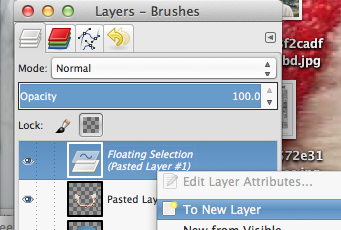
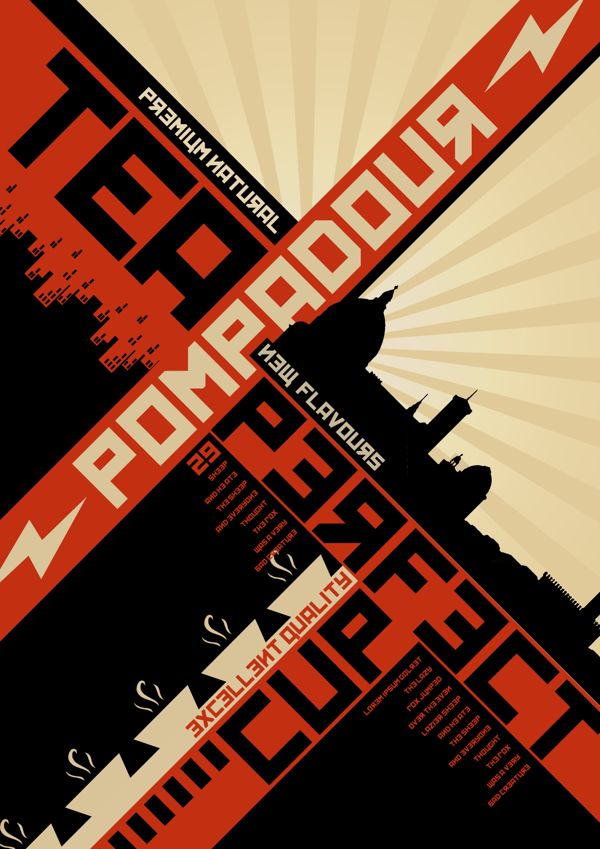
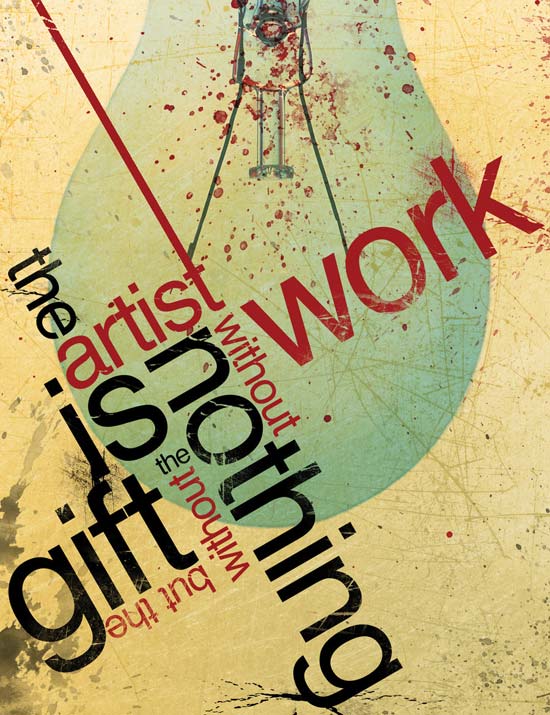
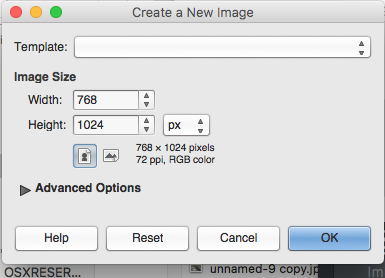
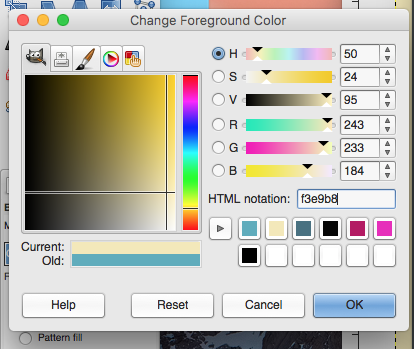
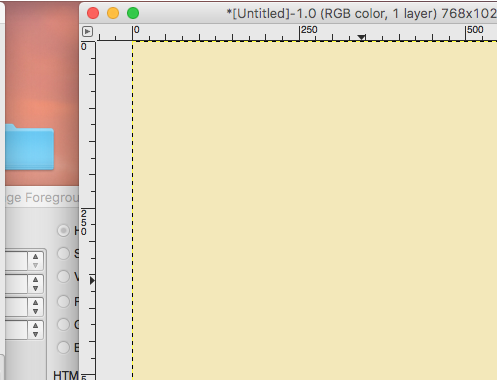
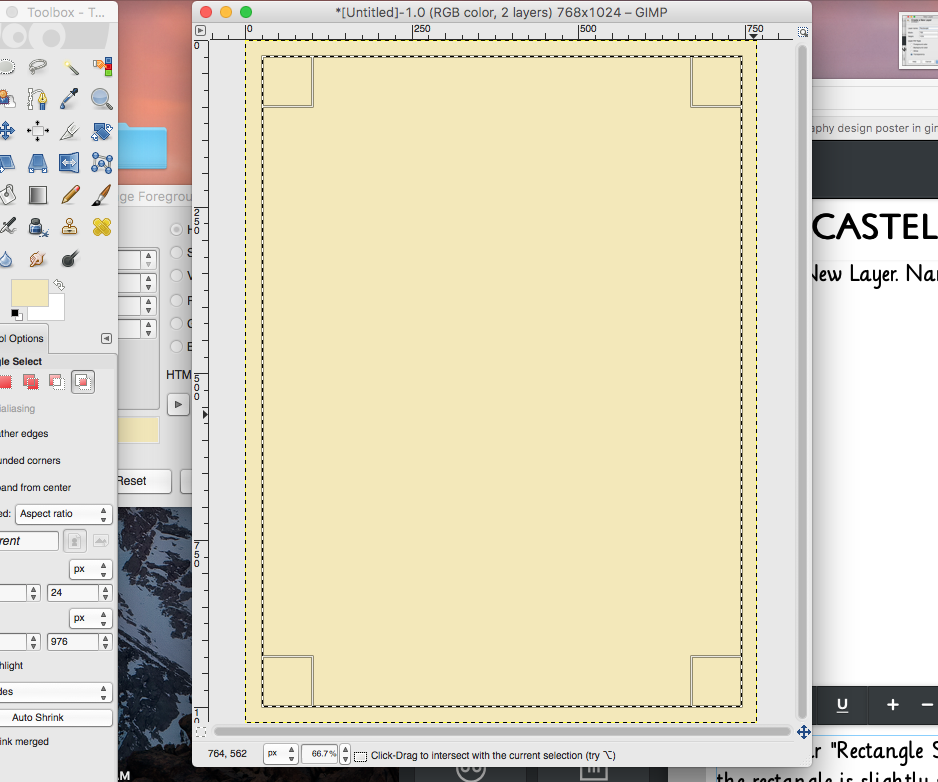
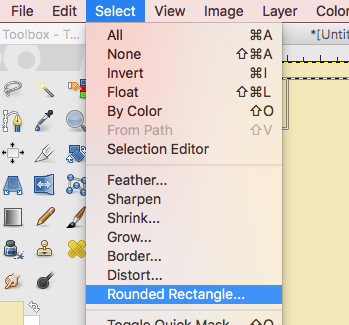
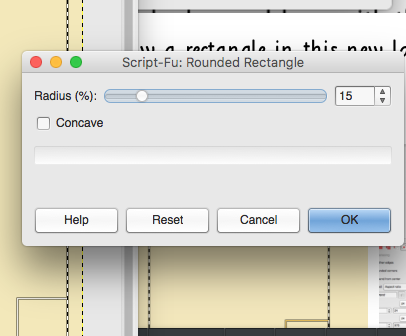
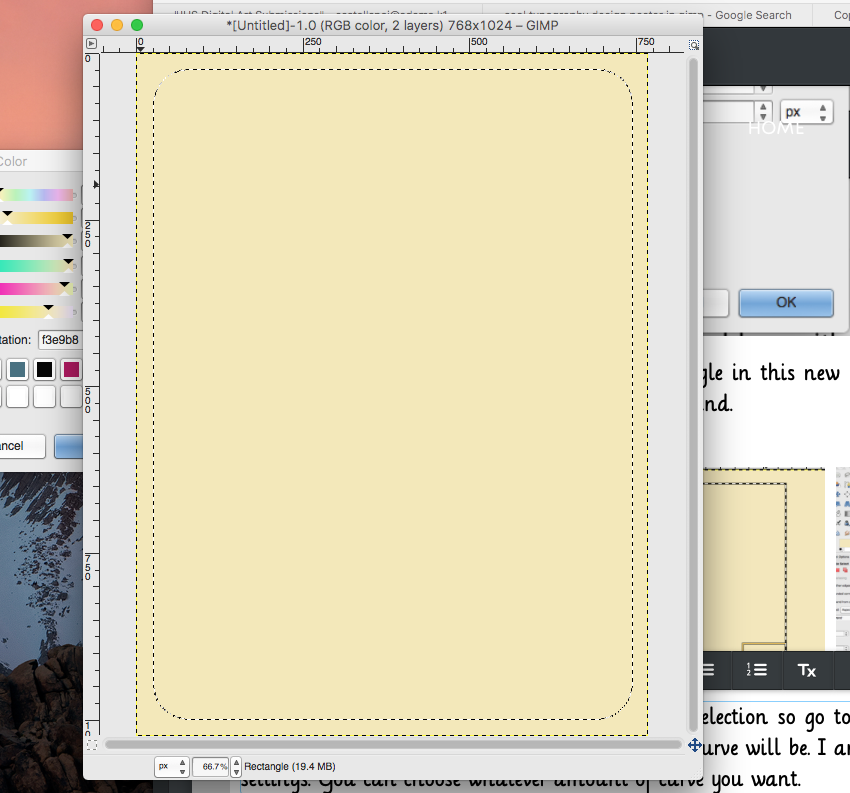
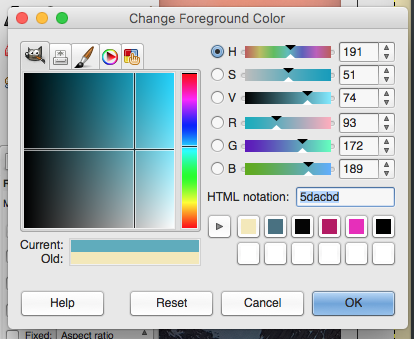
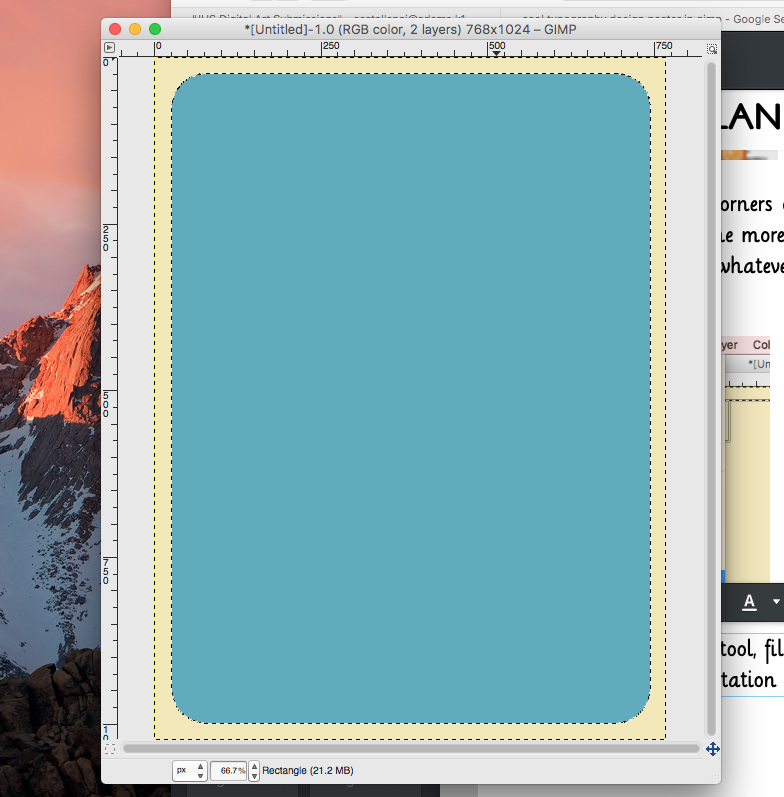
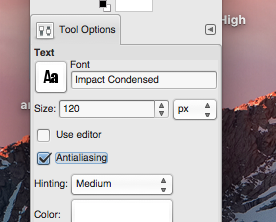
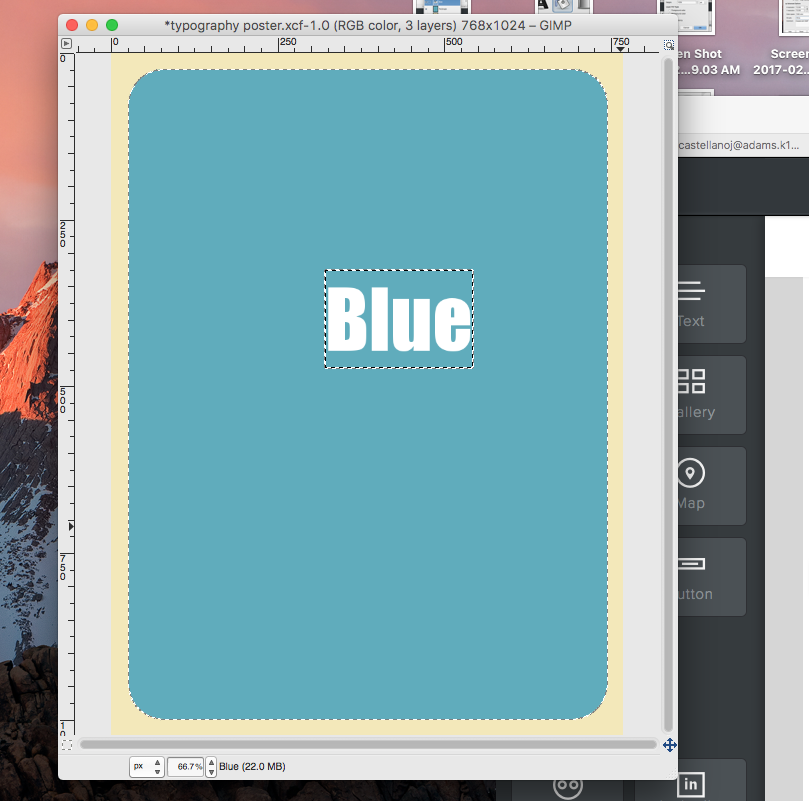
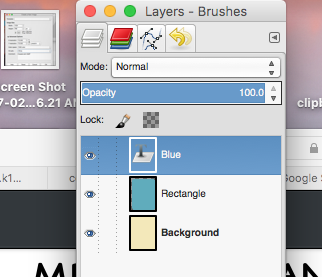
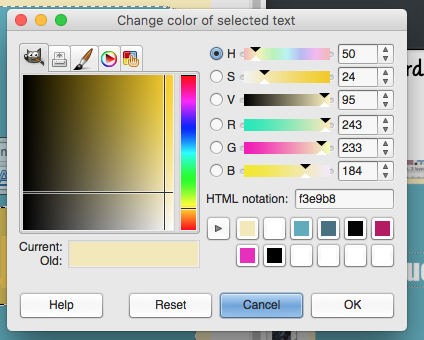
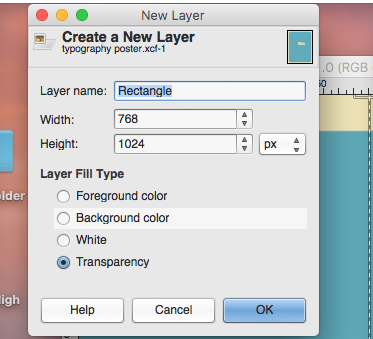
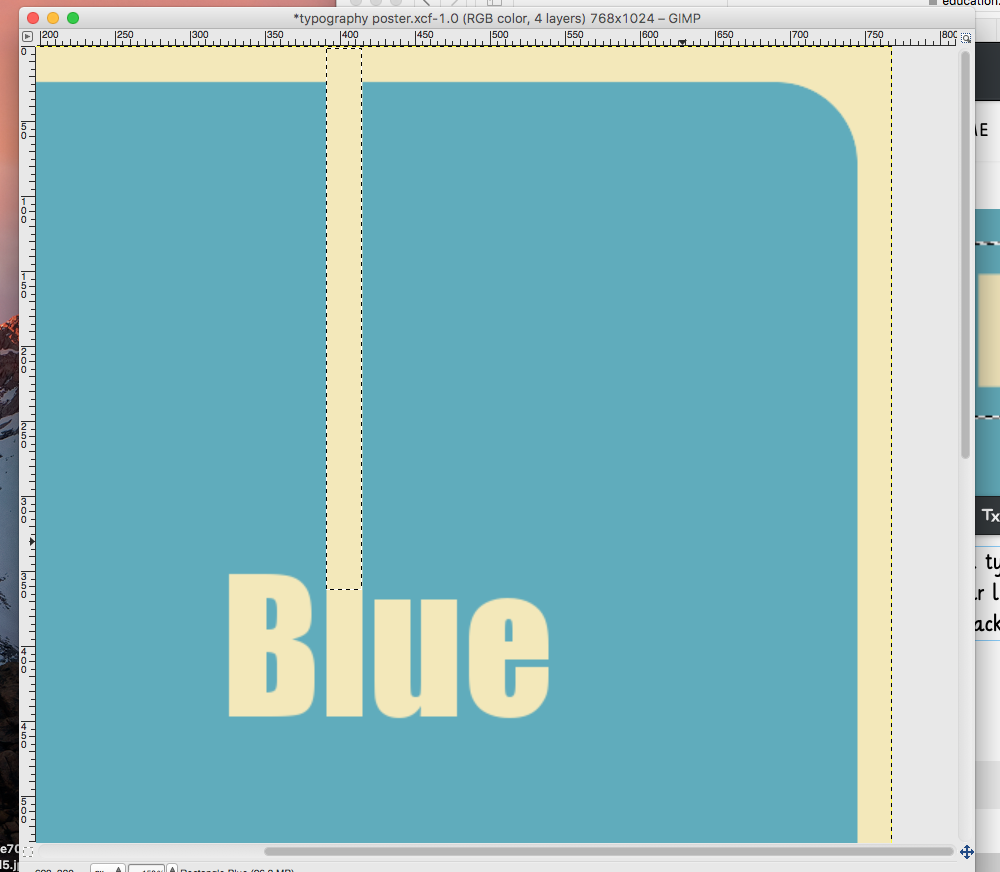
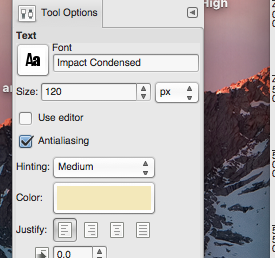
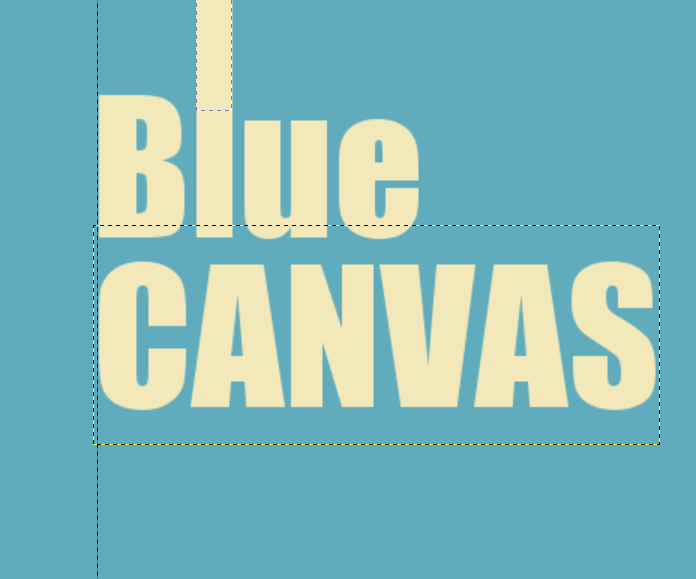
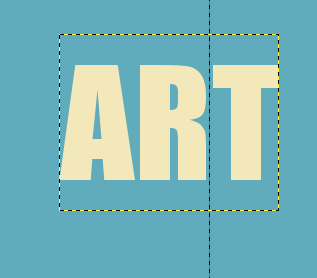
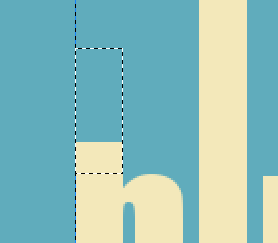
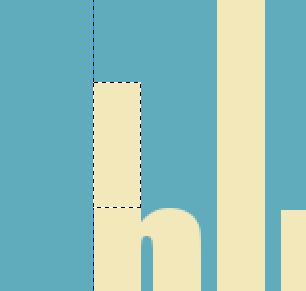
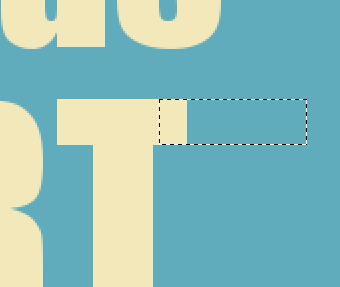
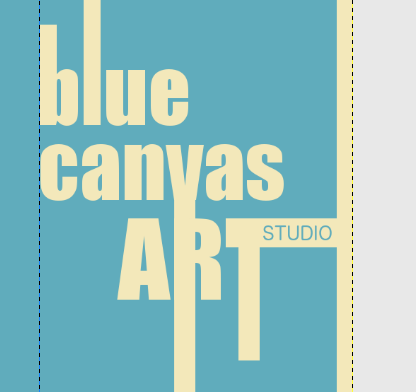
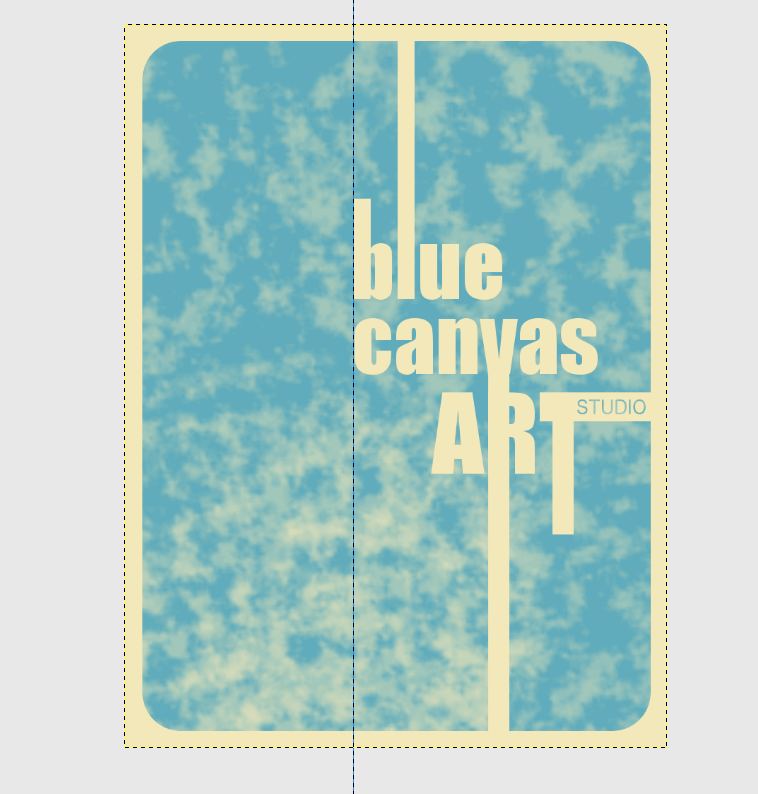
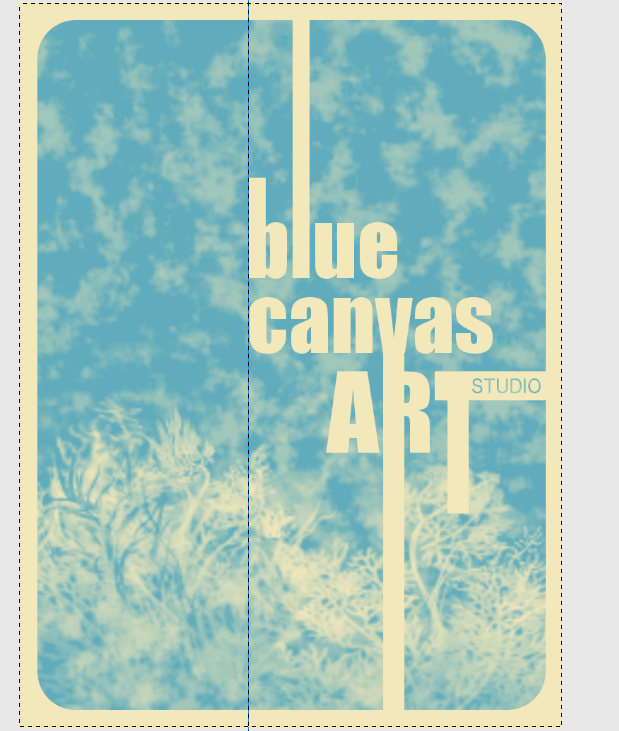
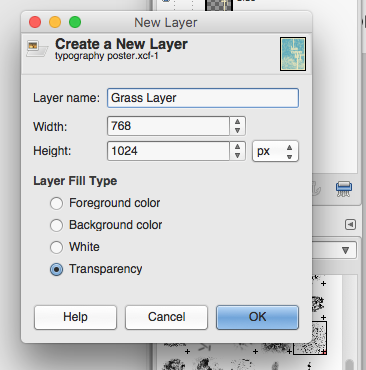
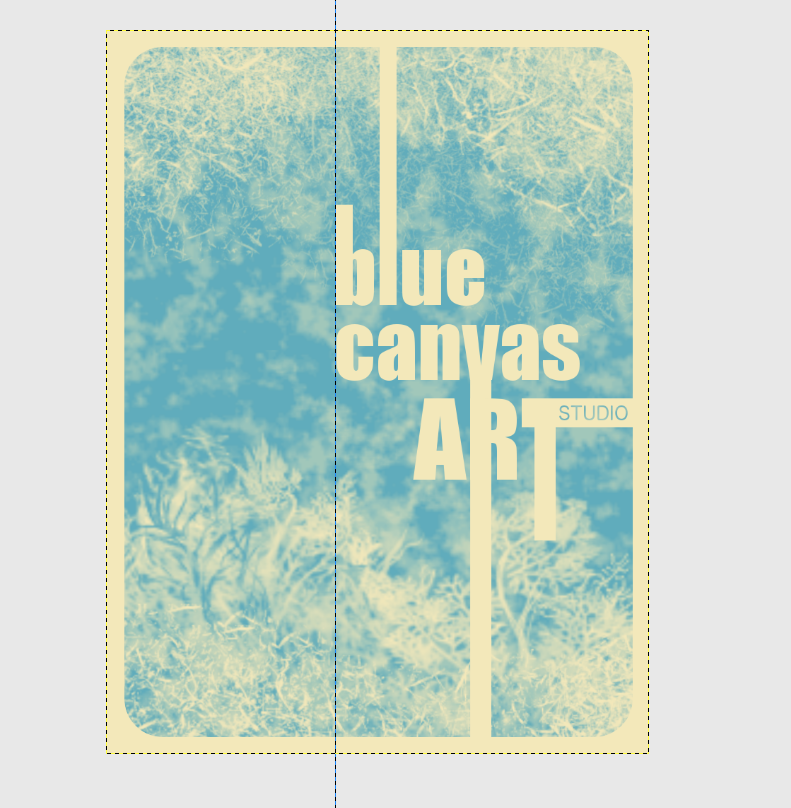
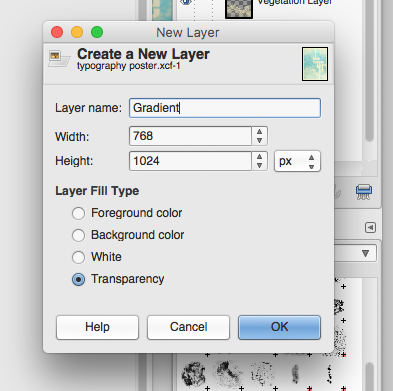
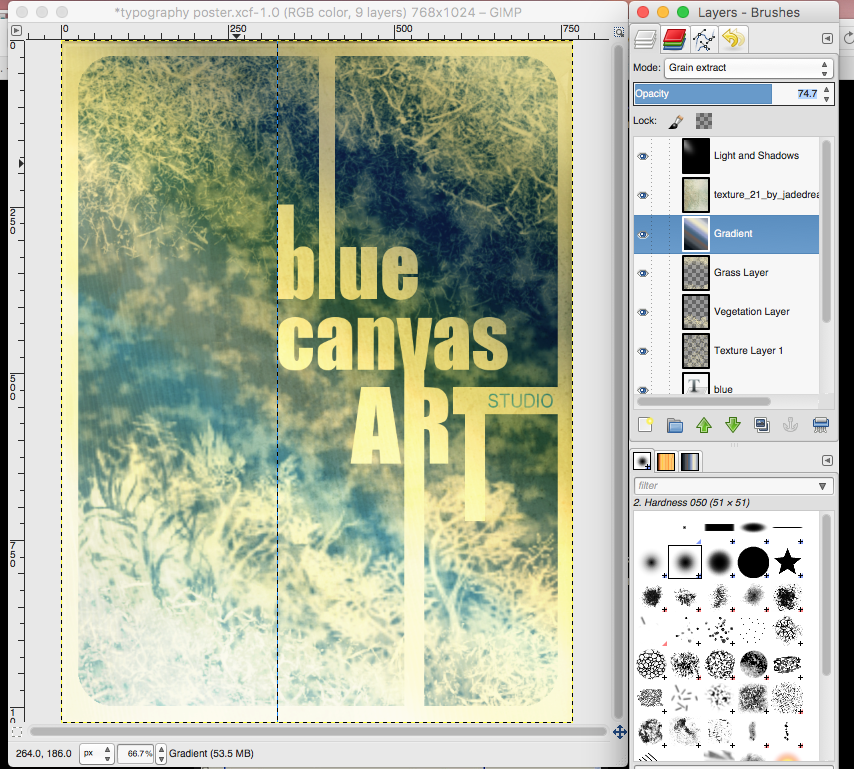
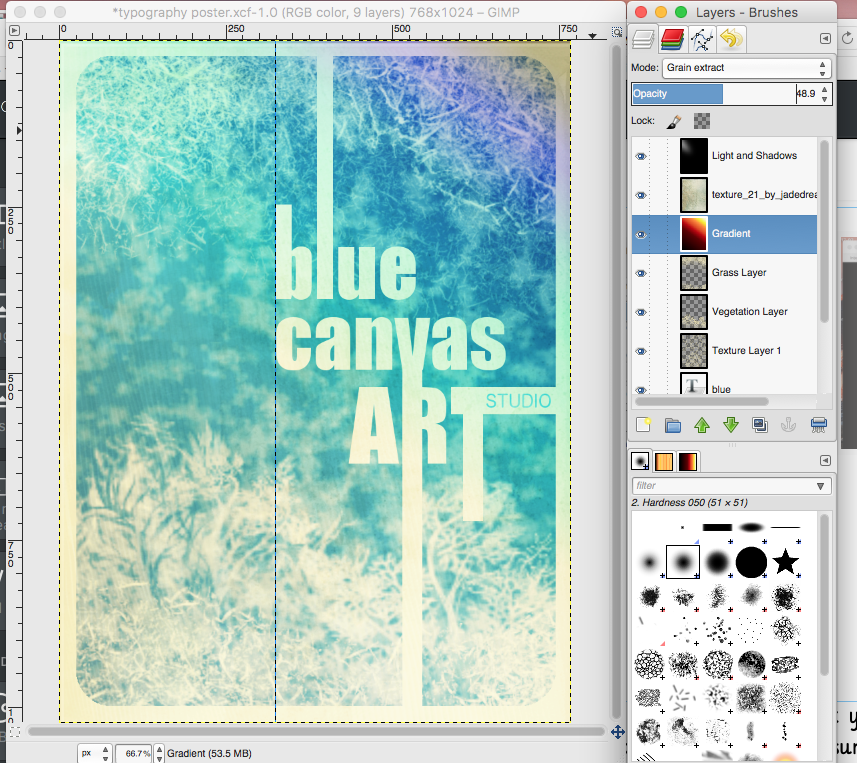
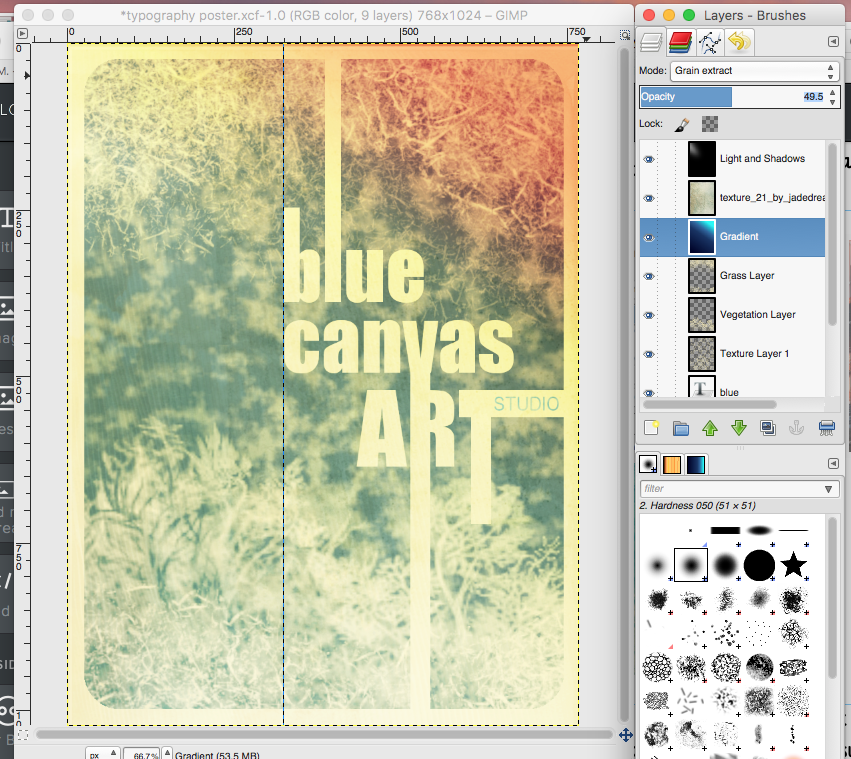
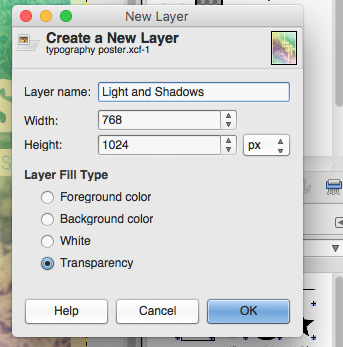
Use the Blend/Gradient Tool. Check your TOOL OPTIONS!!! Make sure that it is set at FG-->Transparent and a radial shape. With short strokes, blend the line/seam. You may have to undo a lot of these small moves if the look off. Command-->Z for Macs and Control-->Z for windows will be your friend. Apply the Layer mask and Merge the two layers together. Your final image should seem seamless. 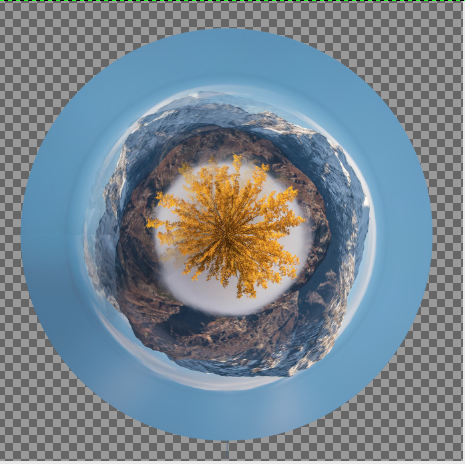 Now you can add a set of hands or a hand holding your "planet". Save one of the hand images below and open it in GIMP.....or you can find your own set of hands to use. click and drag your hand layer onto your stereographic image. make sure the hand layer is on top. Using your lasso tool, select only the hands in the image. Go to Edit-->Copy and Edit-->Paste to create a new layer. Next, Right/Control Click on your Floating Selection and click "To New Layer". Using your Scale Tool (scale) adjust the size of both your planet and your hands so that they fit together. Now play around with different background images When you are finished export the image as a .png or .jpeg (file-->Export As). Make sure you pay attention to where you export it so that you can find it later. Email it to me as an attachment. 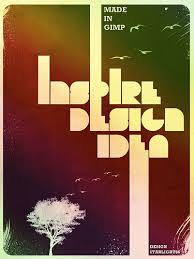 For this next project you will be creating a typography design poster. We will learn how to make some elements look rough or dirty, add texture, and create depth using light effects. We will focus Design Principles of Contrast, Emphasis, and Rhythm. Although I have created a step by step tutorial. You may choose whatever fonts, colors and images that will affect your final design. These will all look VERY different at the end. You still need to follow the instructions and use each tool that I use. But feel free to play around with settings and colors so that you get the look you want for your poster. I will be creating a poster for my art studio....Blue Canvas Art Studio....you may choose whatever you want. A local business, made up business, a quote or song lyric, a band or team.....anything goes. What to do....First you will need to create a New Document in GIMP. Set the Image Size to 768X1024 pixels. Make sure the Portrait orientation is selected. Click on your foreground color to change it. Choose whatever color you would like to use (this color will eventually be a thin border around the edge of your poster.) I went with a neutral tan color. If you look on the right side of the Change Foreground Color window you will see where you can enter a code under "HTML Notation"--the code for the color I used is f3e9b8 Using your paint bucket tool, fill in your background layer with this new color. Create a New Layer. Name this layer "Rectangle" with the background set as "Transparency" 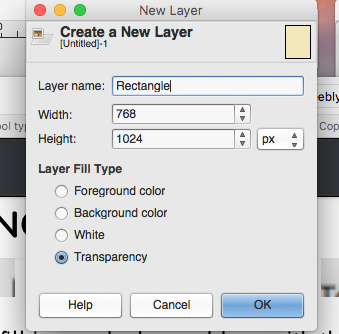 Using your "Rectangle Select Tool" draw a rectangle in this new layer. Adjust the size so that the rectangle is slightly smaller than the background. We want to round the corners of this rectangle selection so go to Select-->Rounded Rectangle. The higher the Radius the more pronounced the curve will be. I am going to go with 15 for my settings. You can choose whatever amount of curve you want. Using your "Bucket Fill" tool, fill this rectangle with a different color. I am going to go with a medium blue (HTML Notation 5dacbd)--you want to make sure you do not choose too light of a color for this layer. Next, we will create some text. For the Typeface, I used a font called Impact Condensed....(choose whatever you like--this font should be bold)....my font size is set at 120....yours may be different depending on the font you choose. Either way this should be large so start at 120 and you can adjust it later. Click any where on your image and type the first word of your poster. Using your Move Tool, you can position the word wherever you want. Double check your Layers Window to see that they are in the correct order. Make your font color the same color of your background. Create a New Layer. Name this layer, "Rectangle (word you typed)" Using the Rectangle Select Tool, create a rectangle extending from the top of one of your letters...make your rectangle go all the way to the top of your canvas. Fill it with the original background color (f3e9b8). Create another Text Layer using the Type Tool. Using the same font (size can change depending on what you are typing) type in your second line and move it to the right place below you first word. Create another New Layer and name it "Rectangle (second word you typed)". Repeat the same steps as before to draw a rectangle extending from a letter in this word to the bottom of your image. Fill it with your background color. Select the Type Tool again and type your 3rd and final line....I am using ART. Use the same background color but play around with the font size until you find the right look. Move your text so that one letter lines up with the bottom rectangle. Create another new layer. Play around with your rectangle select tool to add more shape to your text. Name that layer "Extra Shapes" with the background fill set as Transparency. 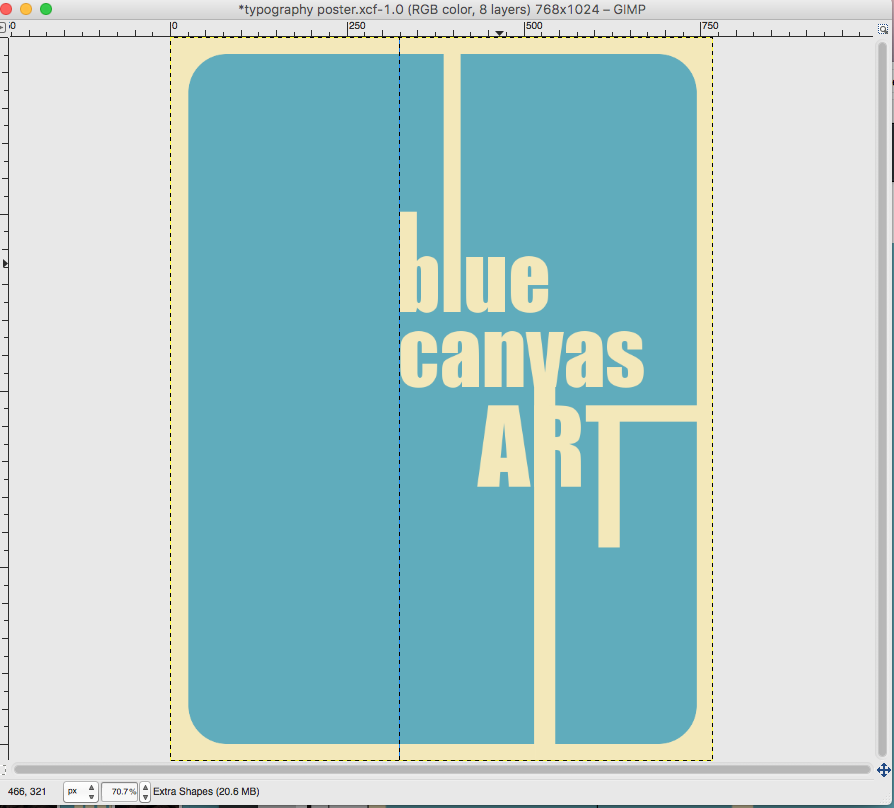
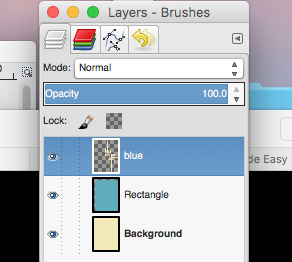
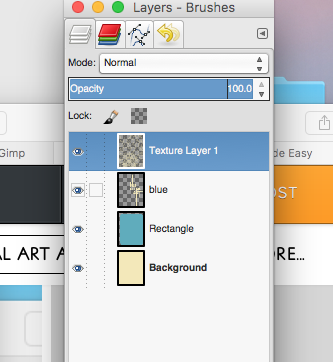
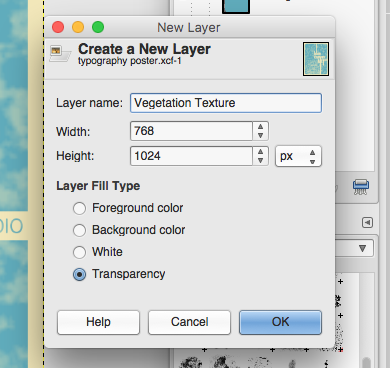
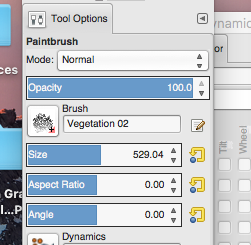
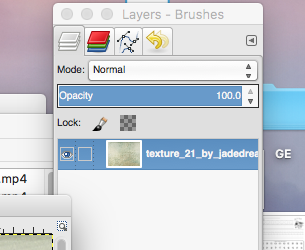
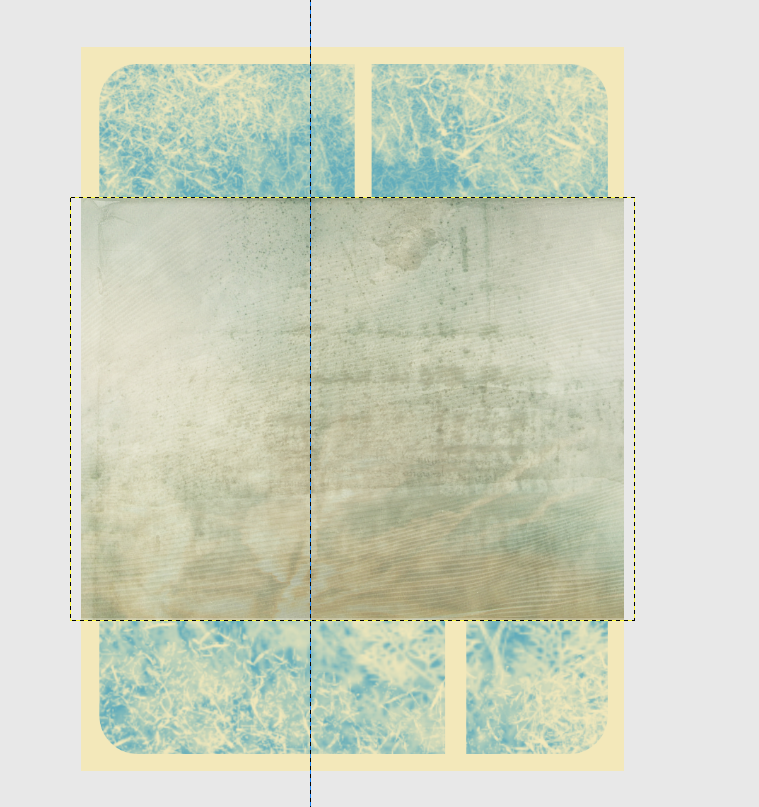
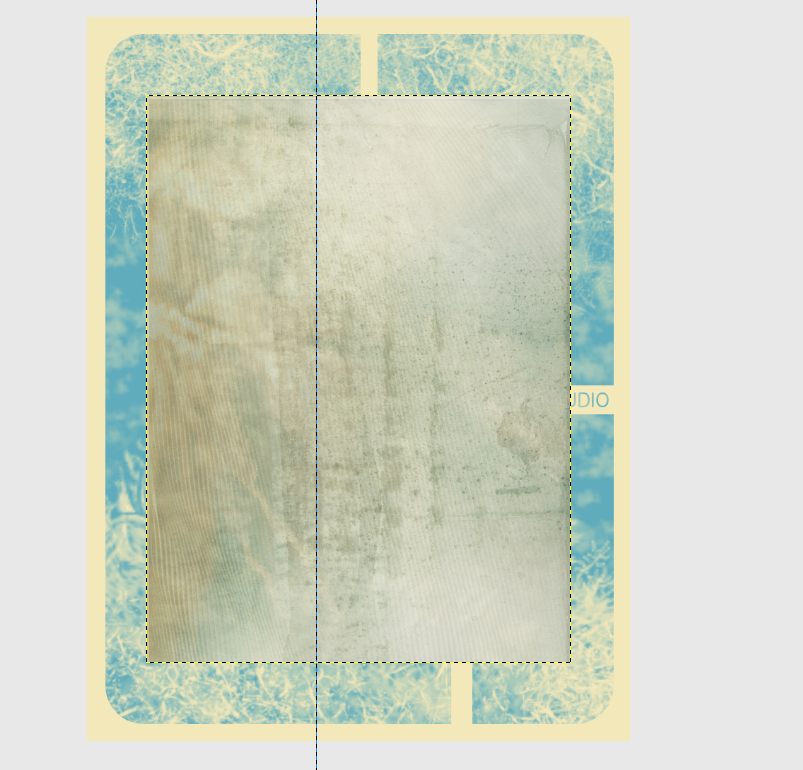
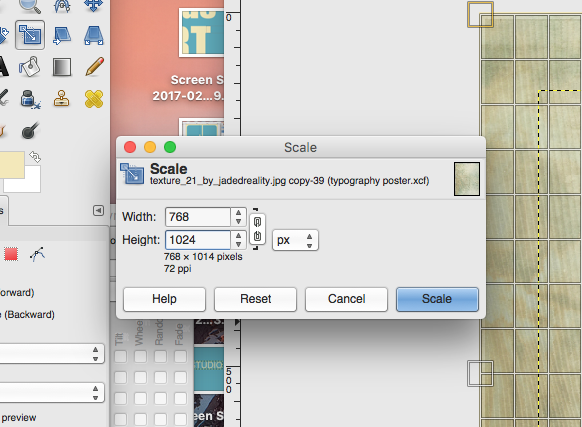
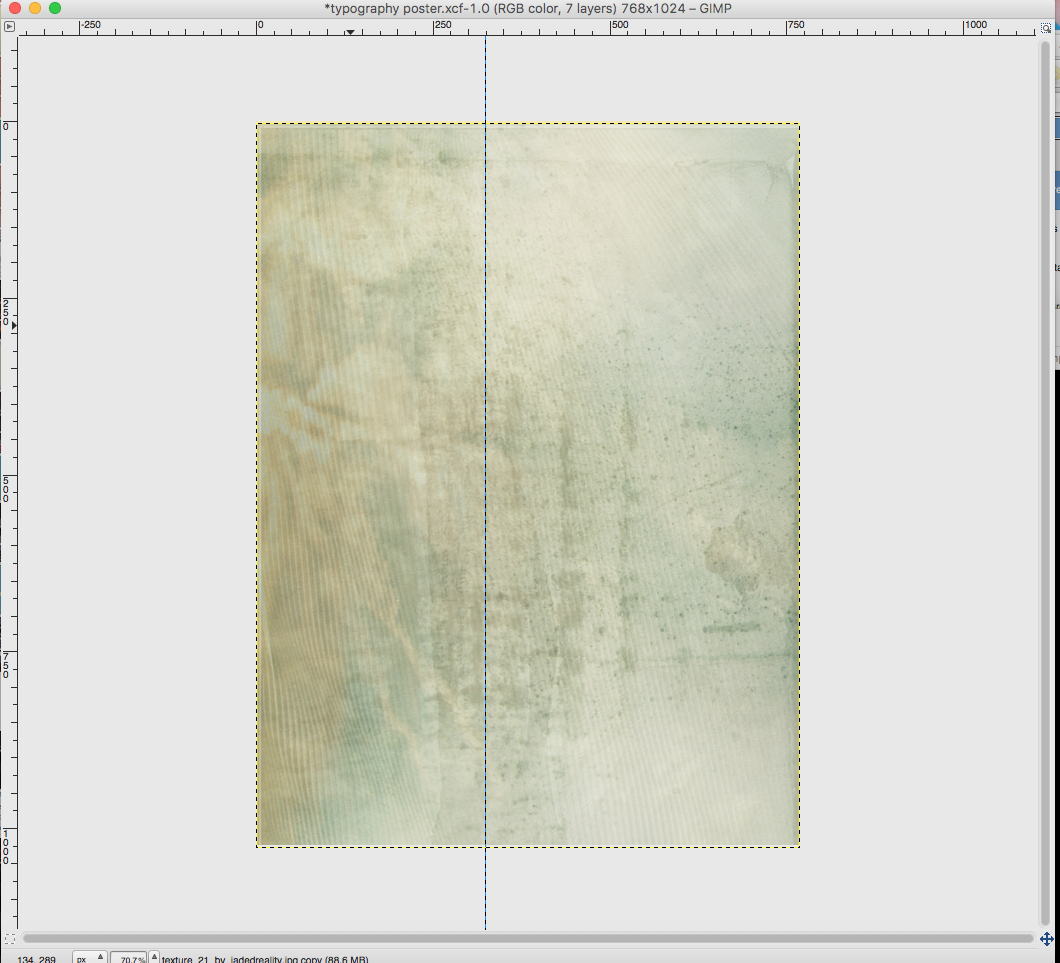
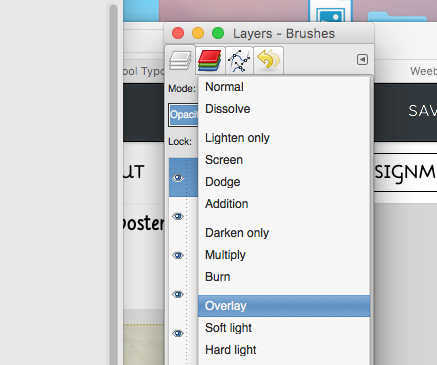
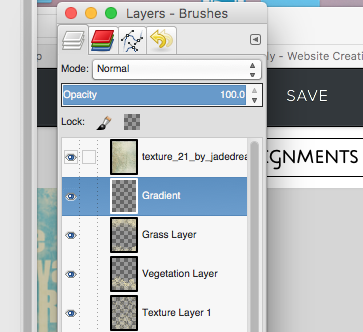
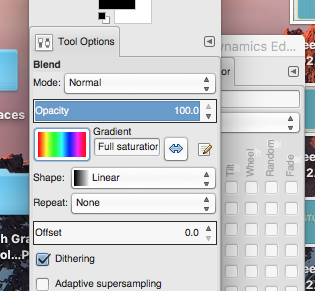
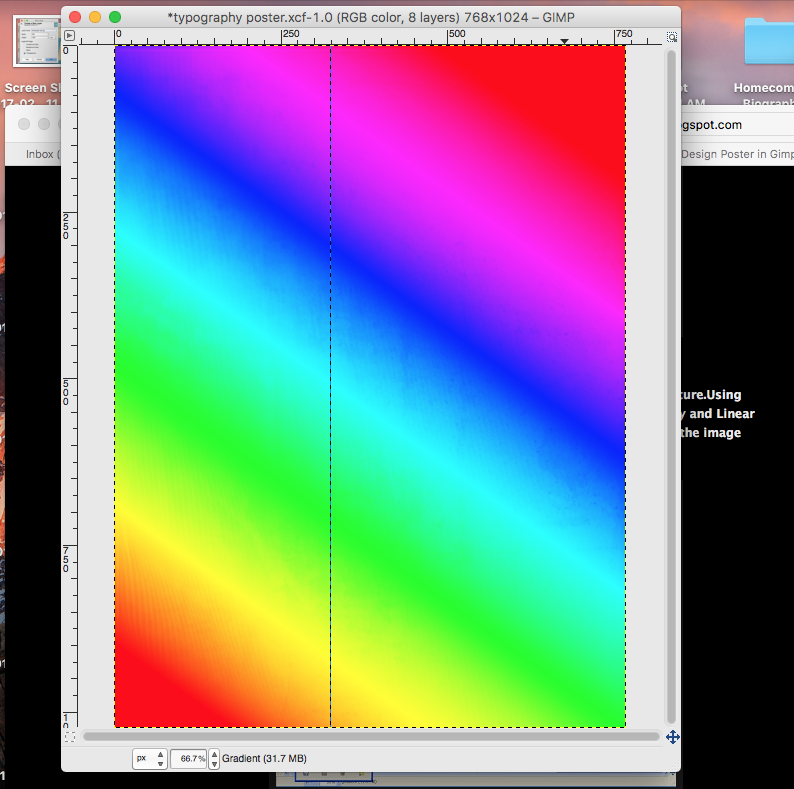
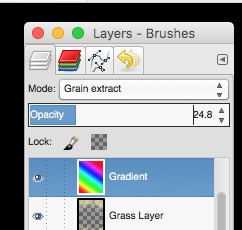
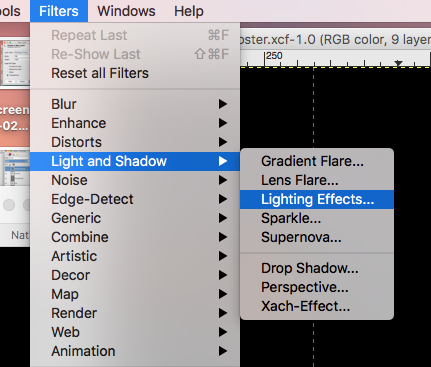
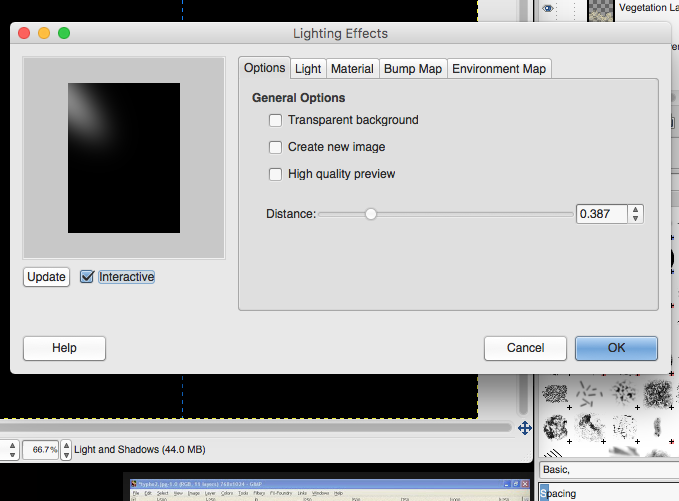
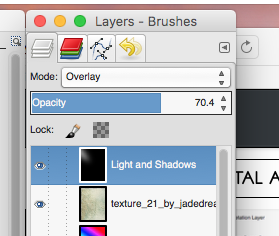
Next you will "MERGE" all text layers into one. With your top layer selected, Right Click or Control Click on that layer and select merge down. This will merge the first two layers together. Continue to do this until you have merged all of your text layers together. DO NOT merge with your back ground rectangles just yet. Remember, once you do this you will not be able to move around your text separately...it will all be one layer. Create a new layer. Name this layer "Texture Layer 1". Explore different brushes to create some texture in the background. Don't go overboard as we will be adding a lot more to the image. You will probably want your brush size to be quite large so that you can just click once or twice to stamp a texture onto your rectangle. I chose to use the Chalk 02 Brush--Size 821. I also changed the opacity of the brush to Create another new layer to add some more texture (I used the vegetation 02 brush so I named this layer Vegetation). Stamp this new texture at the bottom, or side of your text to create some variety--Set the opacity of this brush to 100. Create Another New Texture Layer (I chose to use Grass as my brush). Experiment with Brush Size and Opacity to get another layer of texture on your image. Be careful not to stamp a High Opacity Brush right over your text layer. You will need to Save this Image to your computer and Open it in GIMP.  Drag the "Texture" Layer onto your poster design. Rotate the image using the Rotate Tool (90 Degrees) Using the Scale Tool, change the size of this layer to fit the size of your poster (768X1024 Pixels) Set the Layer Mode to OVERLAY Create a new layer and name it "Gradient". Place it behind....or underneath the Texture Layer you just created. In the Tool Options window select your gradient type (I chose Full Saturation Spectrum--there are three other options displayed below). Set the Shape to Linear and keep the Opacity at 100. Click and drag from one corner to the other. In your layers window. Set the Mode to Grain Extract and set your Opacity of this layer to 24.8--whatever it takes to see your poster again. Check to make sure your layers are in the right order. Now create a new layer on top. Name it "Light and Shadows". Fill it with Black. Go to Filter-->Light and Shadows--> Lighting Effects. Play around with the settings until you get a light effect that you want. Apply the filter. Set the Layer Mode to Overlay and adjust the OPACITY if you need to.  When you are finished go to File-->Export As to export your poster as a .png
Email your final poster to me. |
Mrs. CastellanoDigital Art Archives
May 2017
Categories
All
|


 RSS Feed